Common Vulnerabilities and Exposures (CVEs)
This topic provides guidance on the following actions:
What are CVEs?
CVEs are weaknesses in software that can be exploited to access sensitive information, such as credit card numbers or social security numbers. Because modern software is complex with its many layers, interdependencies, data inputs, and libraries, vulnerabilities tend to emerge over time. Knowing when and how the code you use is vulnerable to attacks is a powerful tool in allowing you to mitigate the potential for harm, and Anaconda Server provides you with everything you need to keep your pipeline secure.
Why trust Anaconda?
Anaconda regularly pulls its CVE databases from the National Vulnerability Database (NVD) and the US National Institute of Standards and Technology (NIST) to minimize the risk of vulnerable software in our applications and web pages. Anaconda has an extensive and well-established process for curating CVEs, assessing whether or not packages Anaconda built are affected by any CVEs, determining which versions in our repository are affected, and mitigating the vulnerability.
Understanding CVEs
Here’s what you need to know to make the right decisions regarding CVEs for your organization:
Common Vulnerability Scoring System (CVSS)
Standards for determining the severity of a CVE have evolved over time. The Common Vulnerability Scoring System (CVSS) is a mathematical method dating back to 1999 that grades the characteristics of a vulnerability. CVSS 2 was developed and launched in 2007. It was later updated to CVSS 3 in 2015 to offer a more comprehensive scoring method that accurately reflects the severity of vulnerability in the real world.
CVE scores
Software developers refer to CVE databases and scores to minimize the risk of using vulnerable components (packages and binaries) in their applications or web pages. CVE scores and ratings fall into one of 5 categories:

CVE statuses
CVEs are assigned a status category as a result of the Anaconda curation process. CVE status categories include:
- Reported - The vulnerabilities identified in this package have been reported by NIST but not reviewed by the Anaconda team.
- Active - The vulnerabilities identified in this package are active and potentially exploitable.
- Cleared - The vulnerabilities identified in this package have been analyzed and determined not to be applicable.
- Mitigated - The vulnerabilities identified in this package have been proactively mitigated in this build through a code patch.
- Disputed - The vulnerabilities’ legitimacy is disputed by upstream project maintainers or other community members.
Note
To view this information in Anaconda Server, click the information icon ![]() next to CVE Status in the channel or package views.
next to CVE Status in the channel or package views.
CVE implementation
CVEs have a dedicated channel in Anaconda Server. This channel pulls from the anaconda.cloud repository, which is updated every four hours. Activating your license automatically creates a mirror of this channel that runs hourly to synchronize between the channel repository and the local database.
Note
Air-gapped networks receive up-to-date CVEs and packages during the initial installation of Anaconda Server, and can update at regular intervals as desired. CVEs are updated daily for air-gapped users, and packages are updated monthly. See Updating CVEs and packages on an air-gapped server.
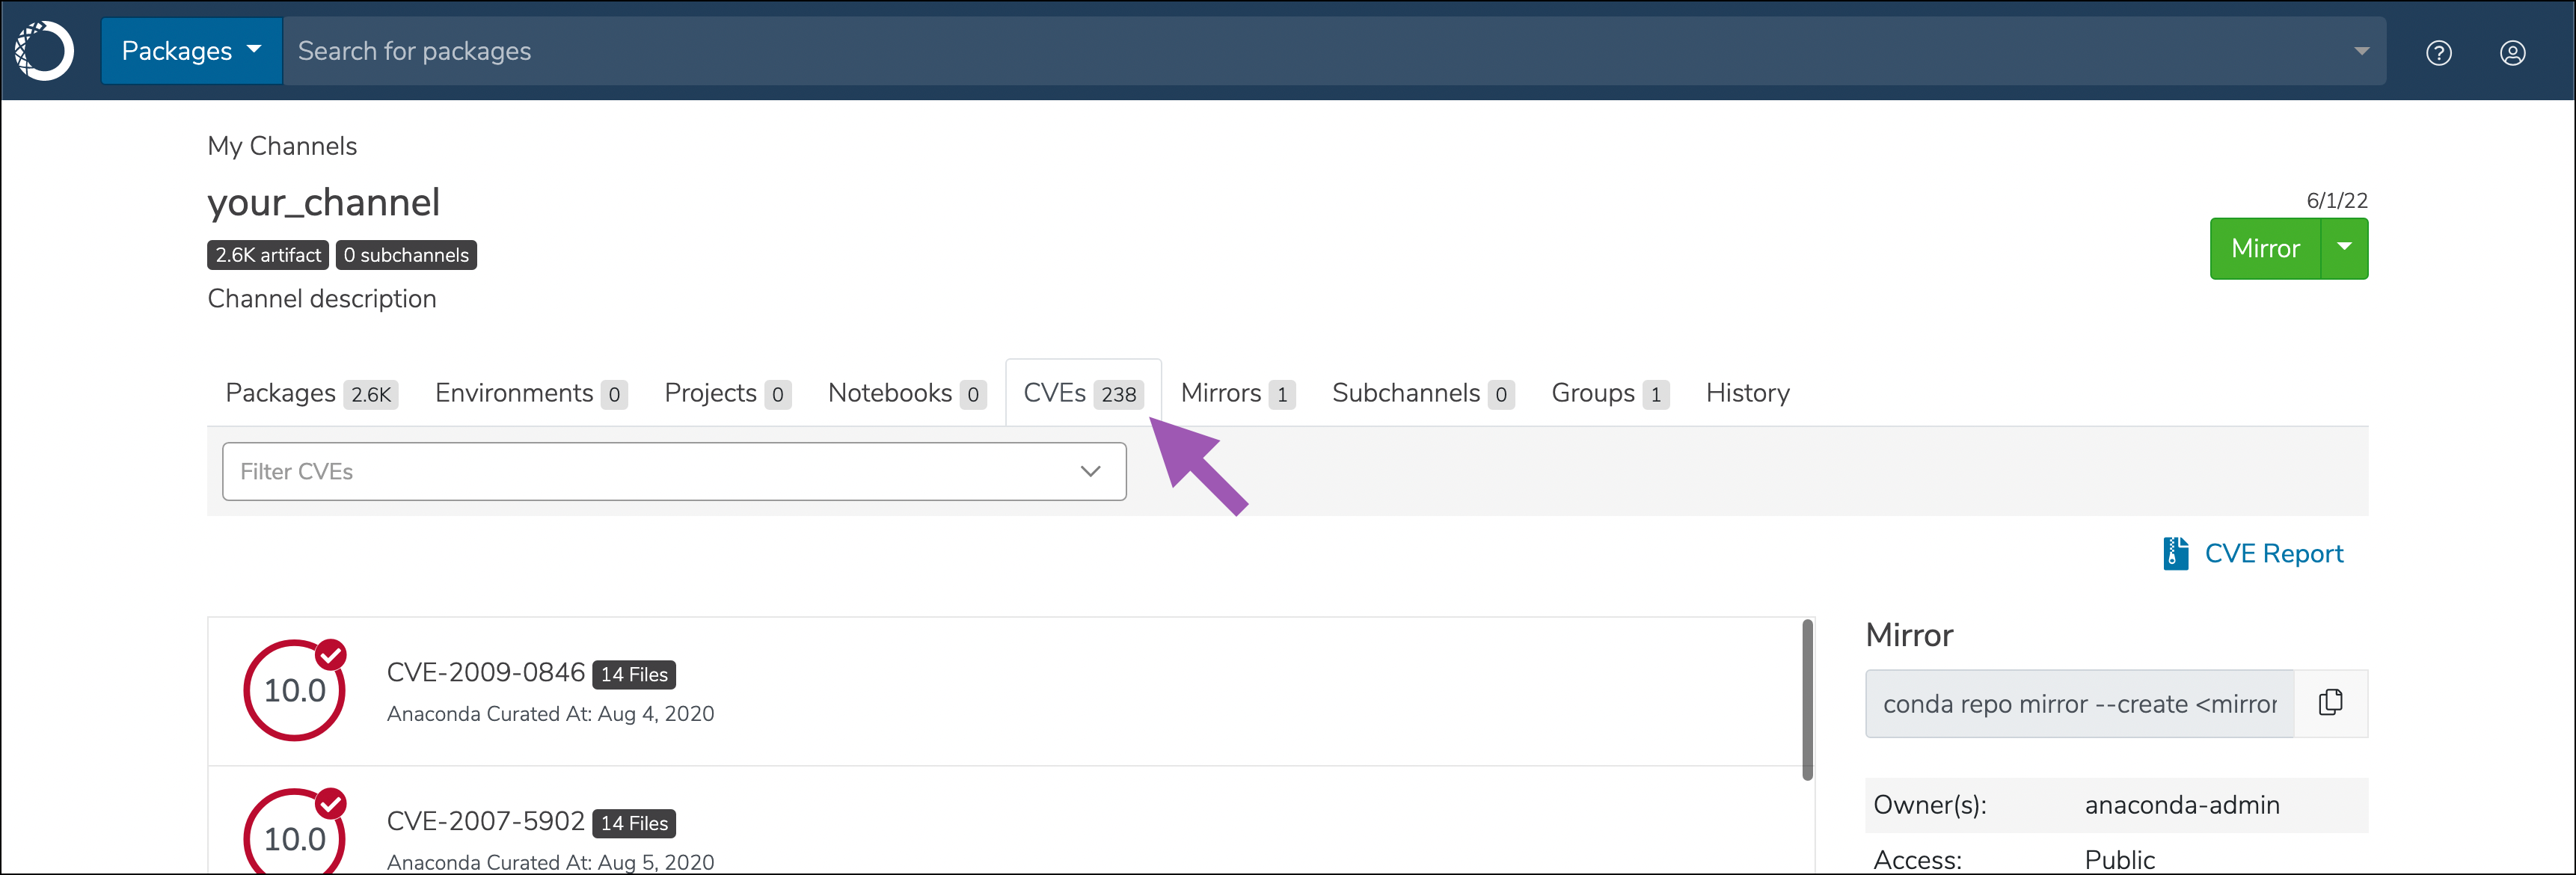
Viewing CVEs by channel
Note
CVE views are only available to users whose role in Keycloak has the cve attribute set to manage.
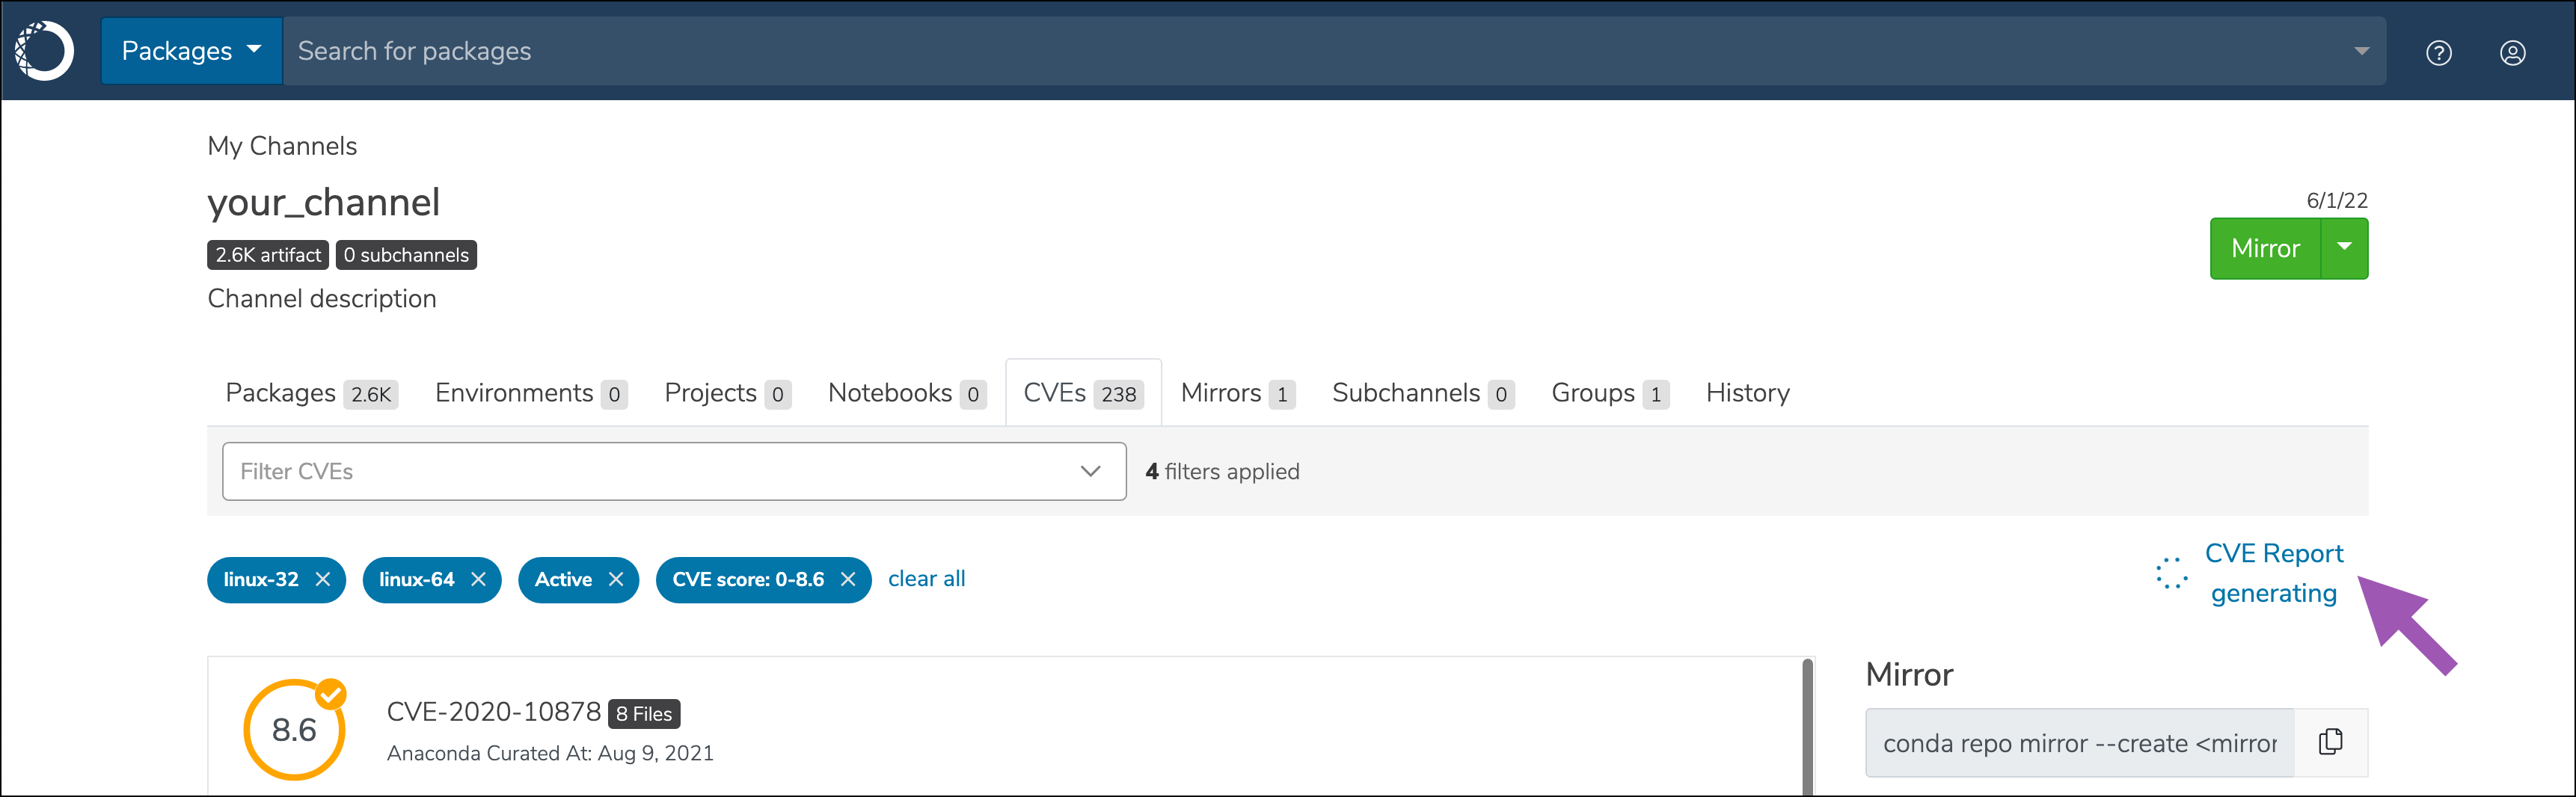
To view all CVEs associated with a channel, open the channel’s page and navigate to the CVEs tab. The number shown in the CVEs tab is the number of CVEs associated with the packages in the channel.
CVEs are listed in order of severity, from highest to lowest, and show how many files are affected by each CVE.
Filtering channel CVEs
To apply filters to your channel’s CVE tab, open the Filter CVEs drop-down menu and enter parameters to filter CVEs, then select Filter CVEs at the bottom of the menu.
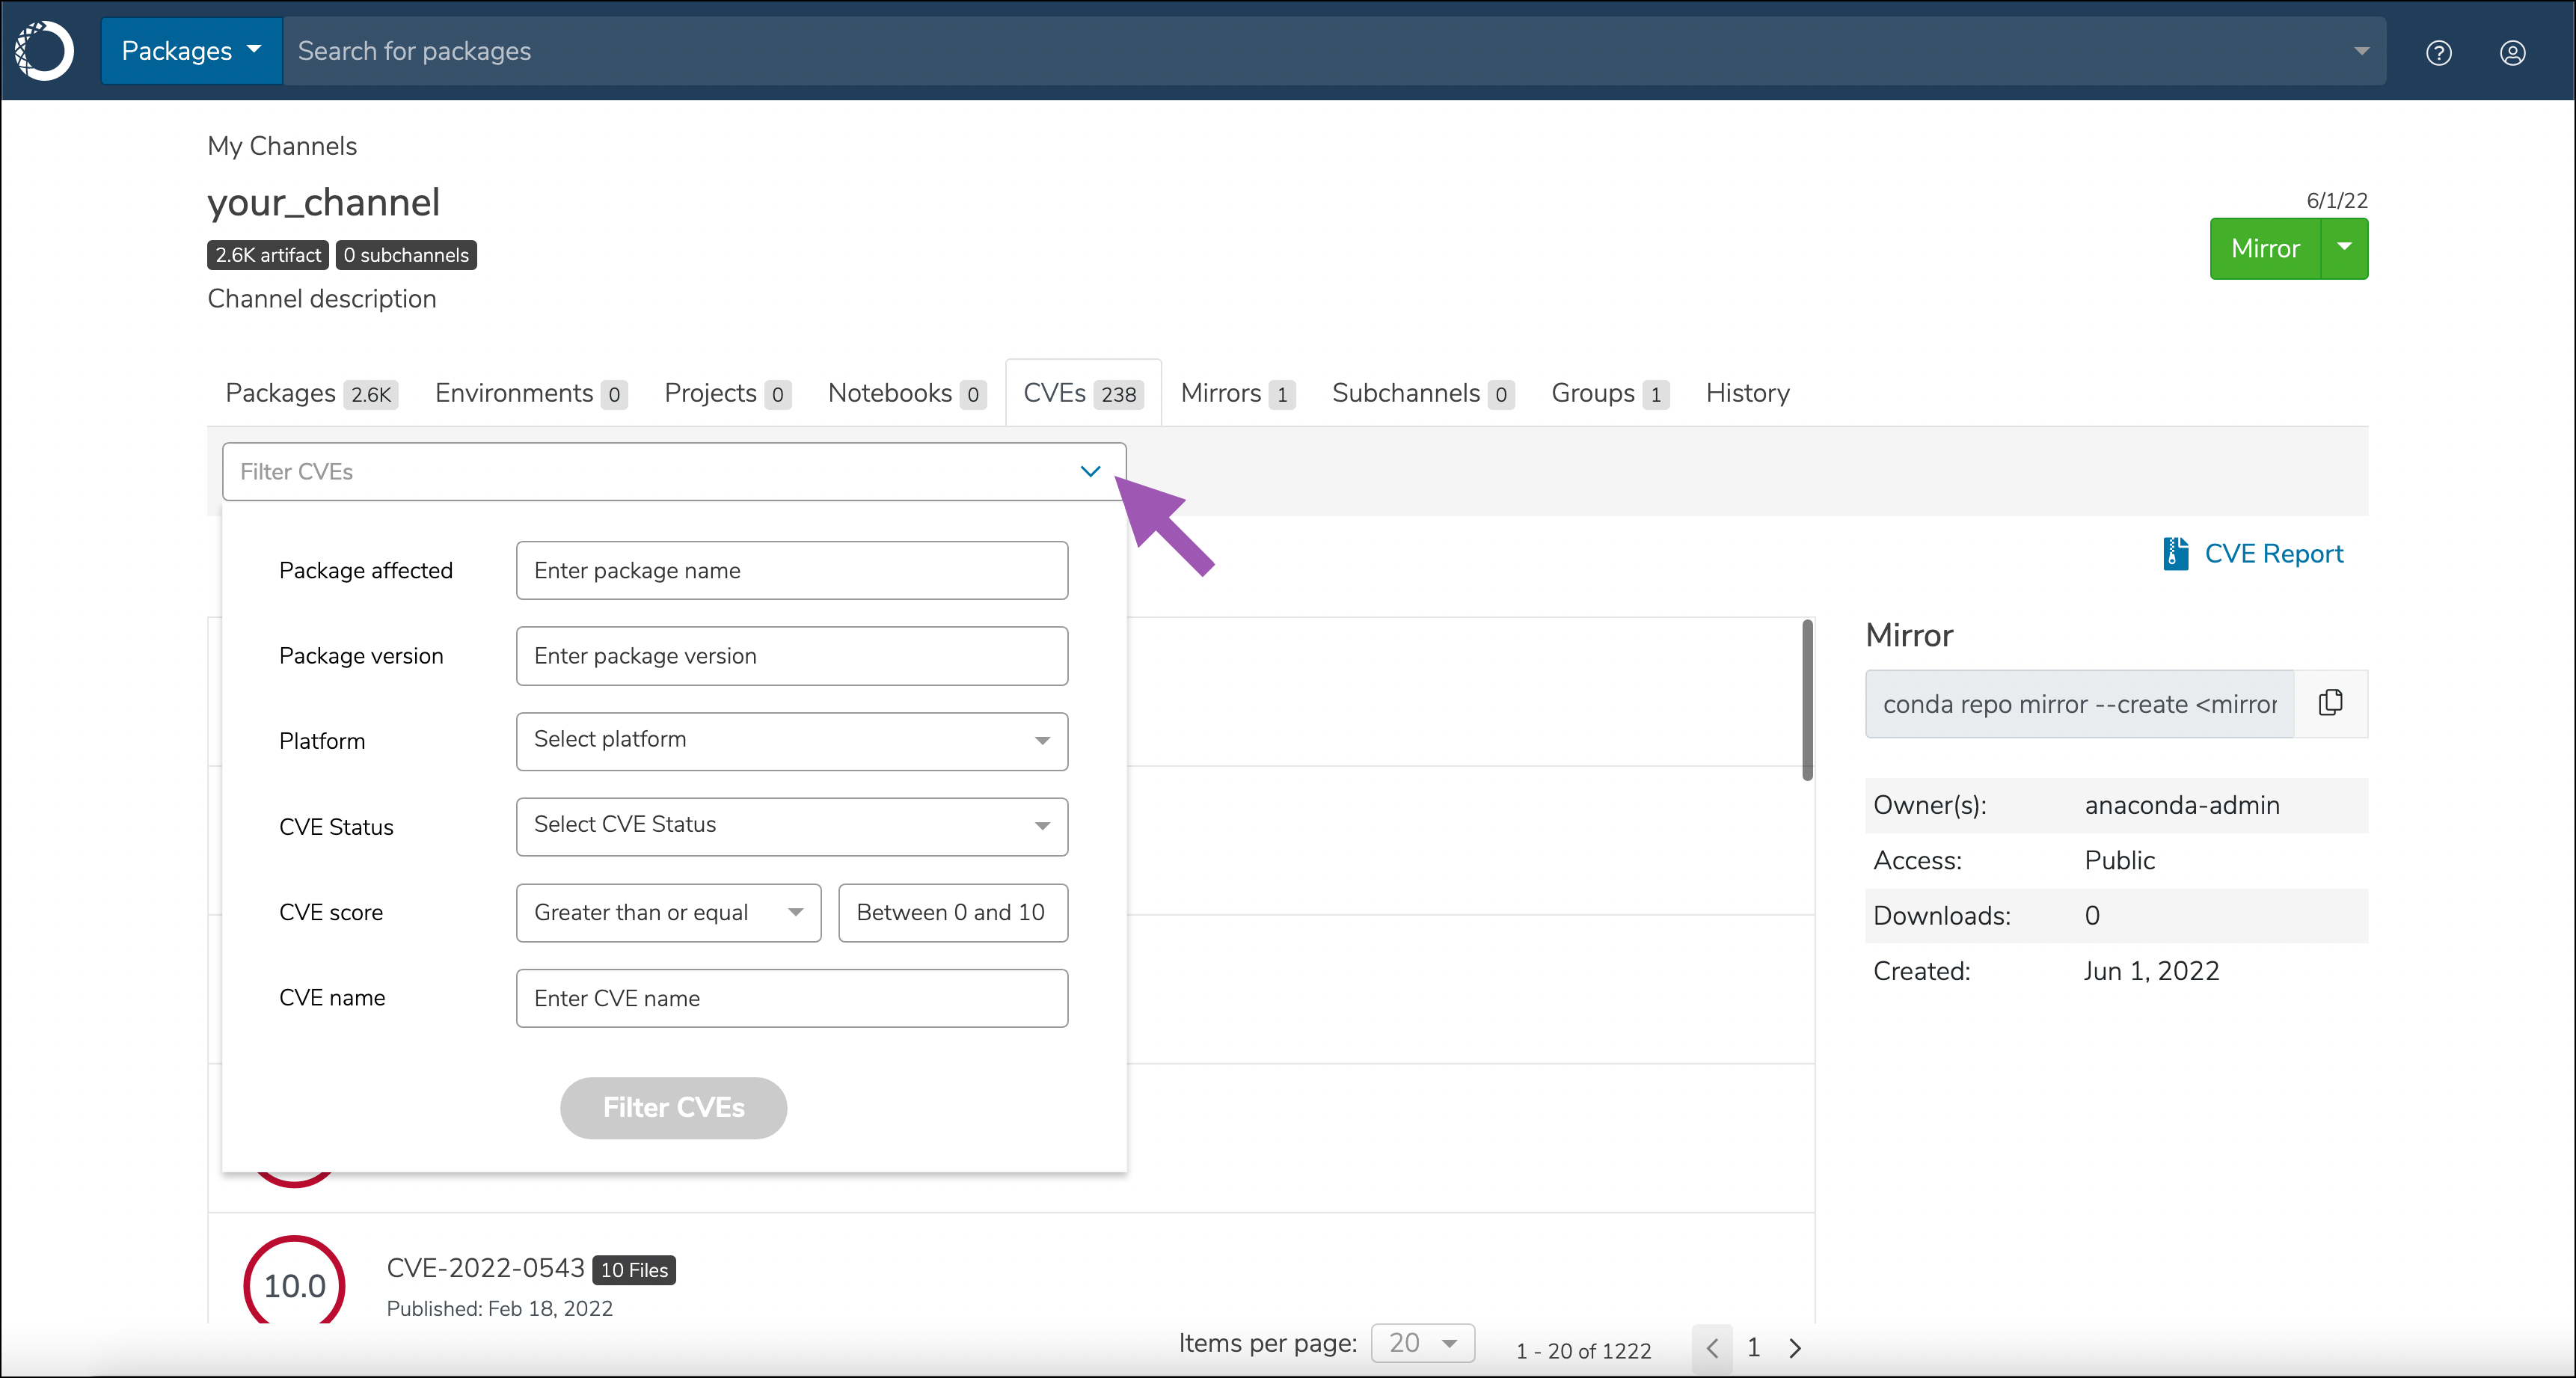
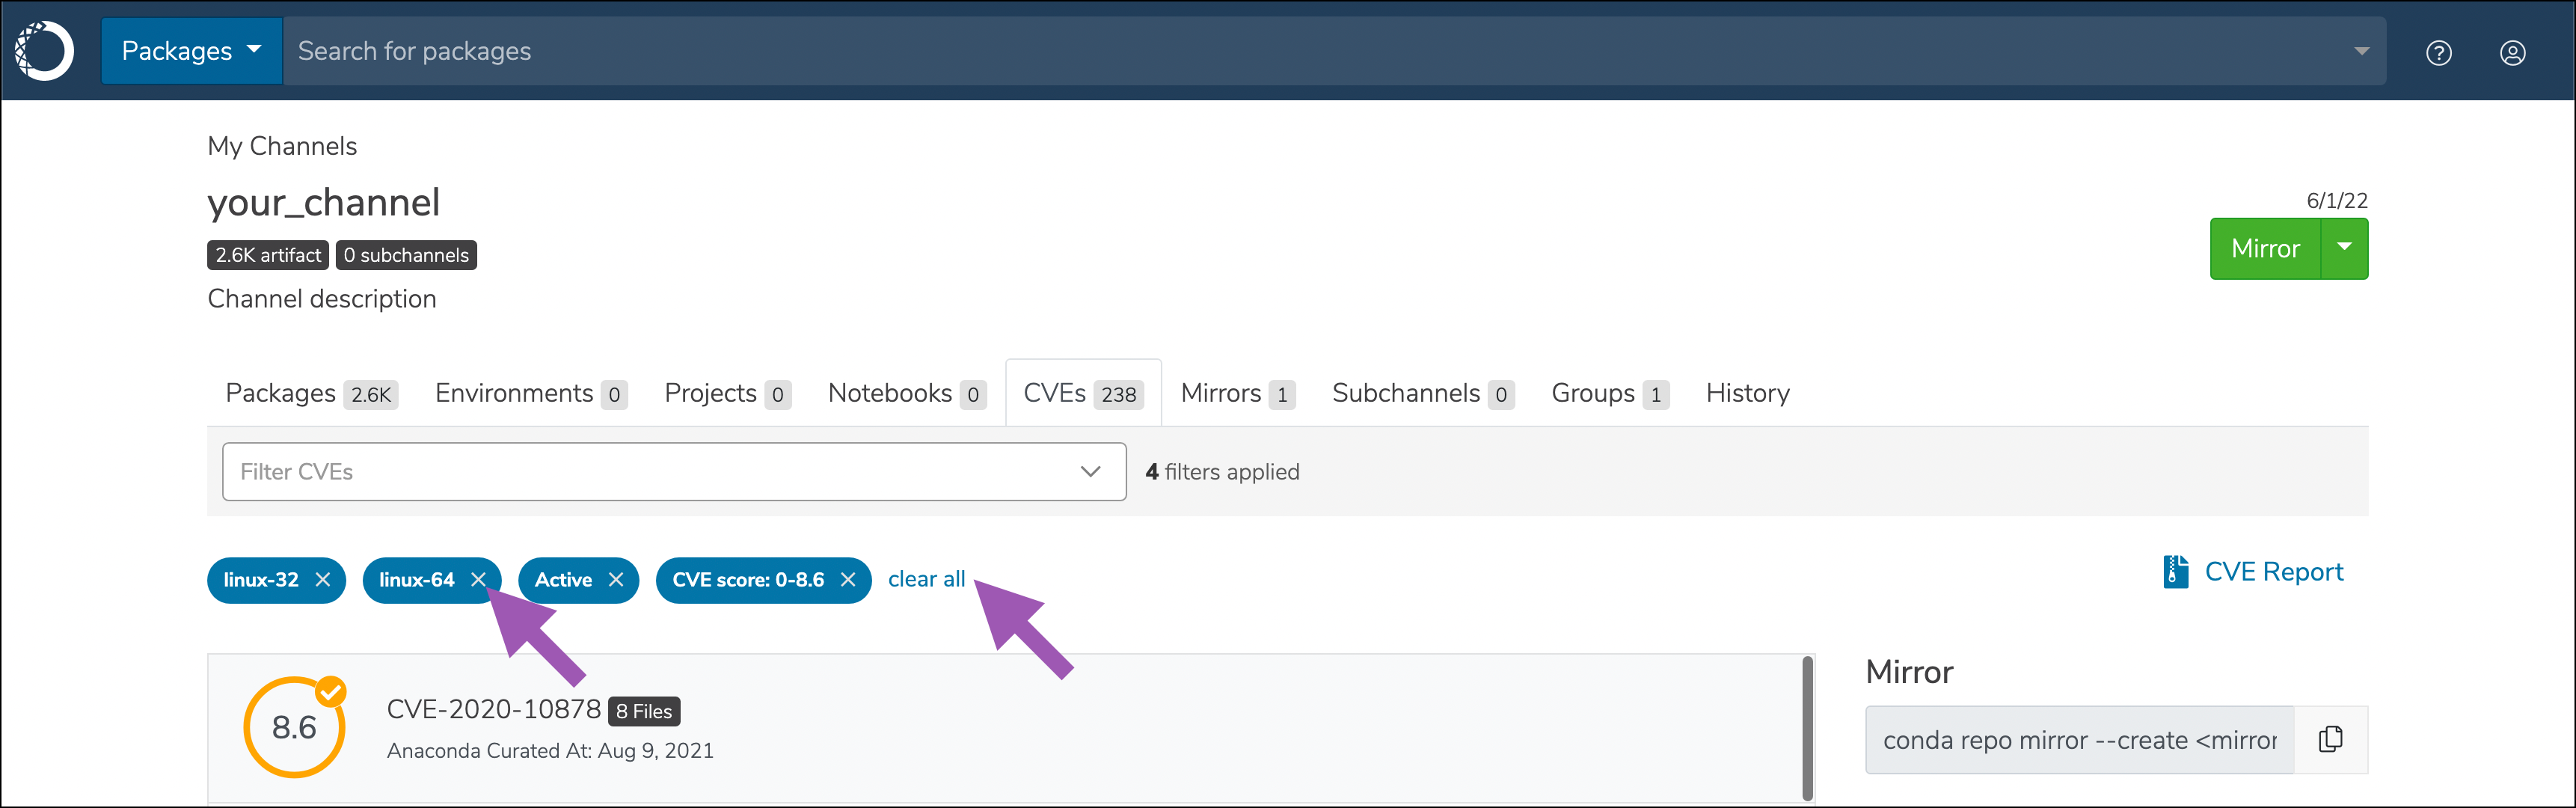
Applied filters persist once entered, and appear as buttons above the filtered list. You can remove filters one at a time, or select clear all to remove all filters.
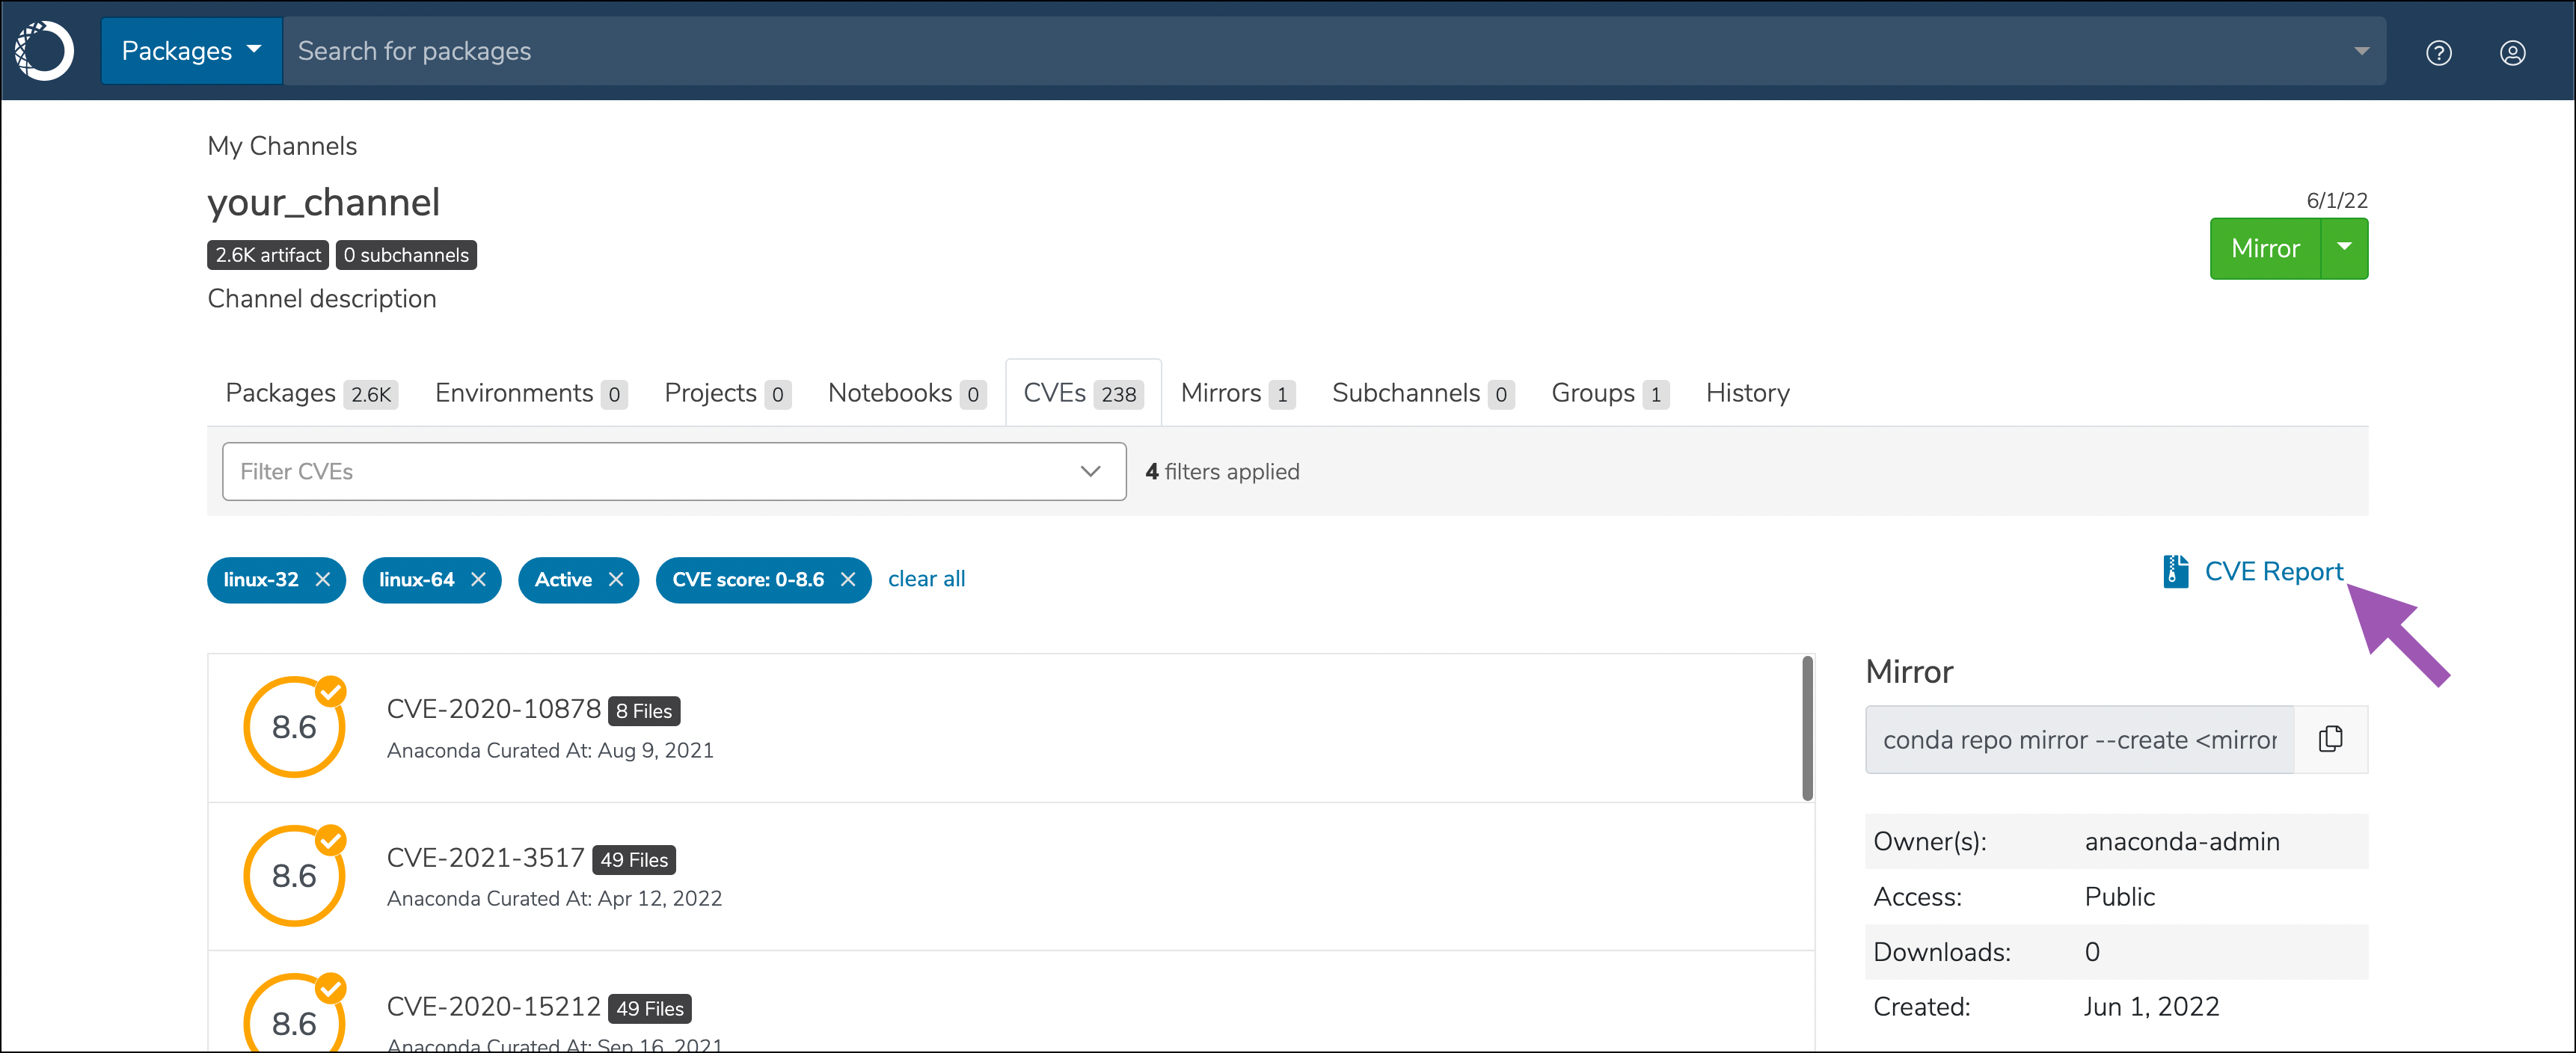
Downloading CVE reports
To create and export a list of CVEs associated with a channel, open the channels page and select the CVE tab, then click CVE Report. This creates a .csv file containing details about the CVEs associated with the channel. If you have applied filters to the channel, the report will contain filtered results.
Note
Once a report has been initiated, it must complete before another report can be exported.
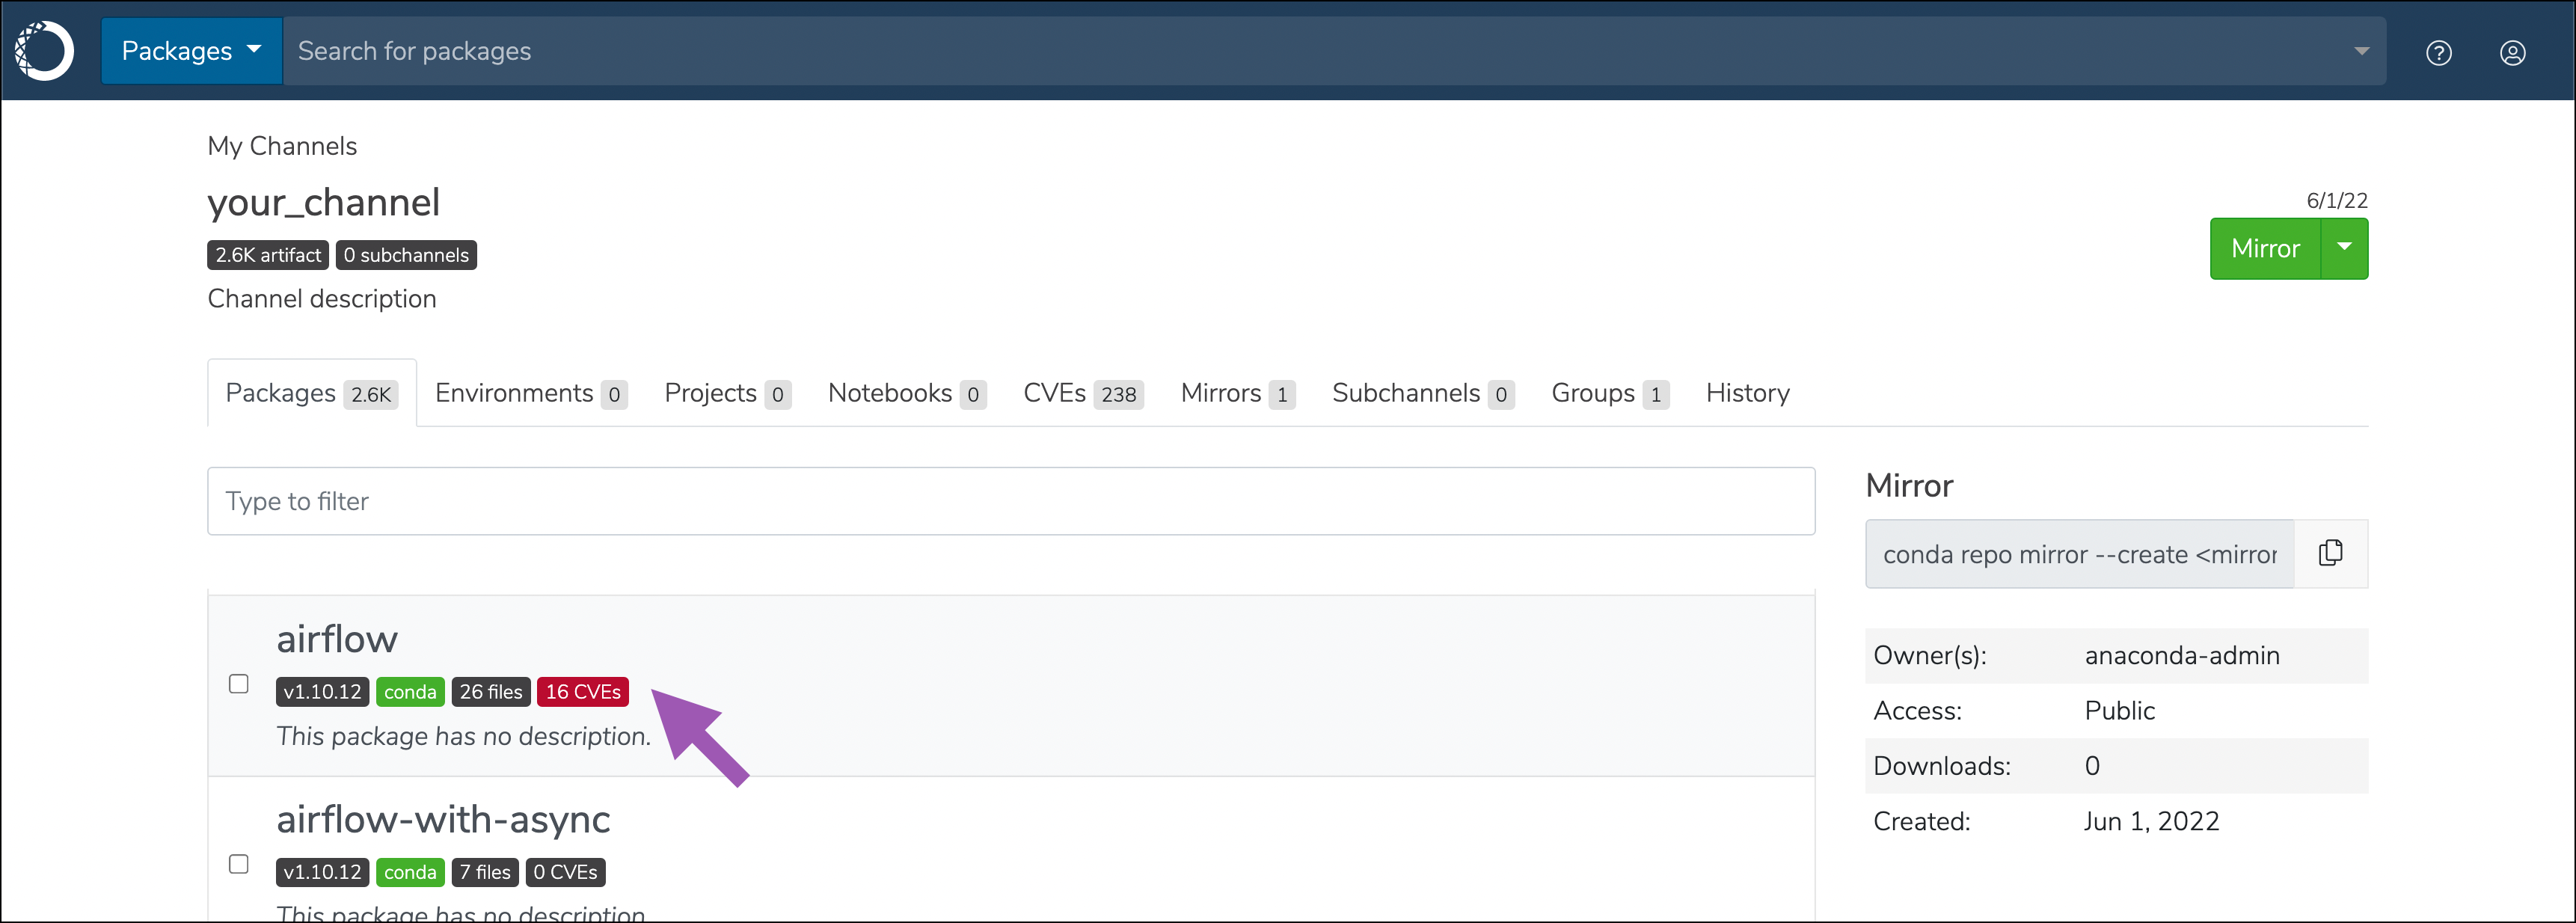
Viewing CVEs by package
All packages have a CVE tag to indicate how many CVEs are associated with them. Open a channel and select a package to view details regarding its associated CVEs.
Under the Files tab, you can see the affected versions of the package, which platform it applies to, the CVSS and CVE scores, CVE status, the number of associated CVEs for each package listed, mirror state, and date uploaded. You can also select the information ![]() icon to view CVE metadata.
icon to view CVE metadata.
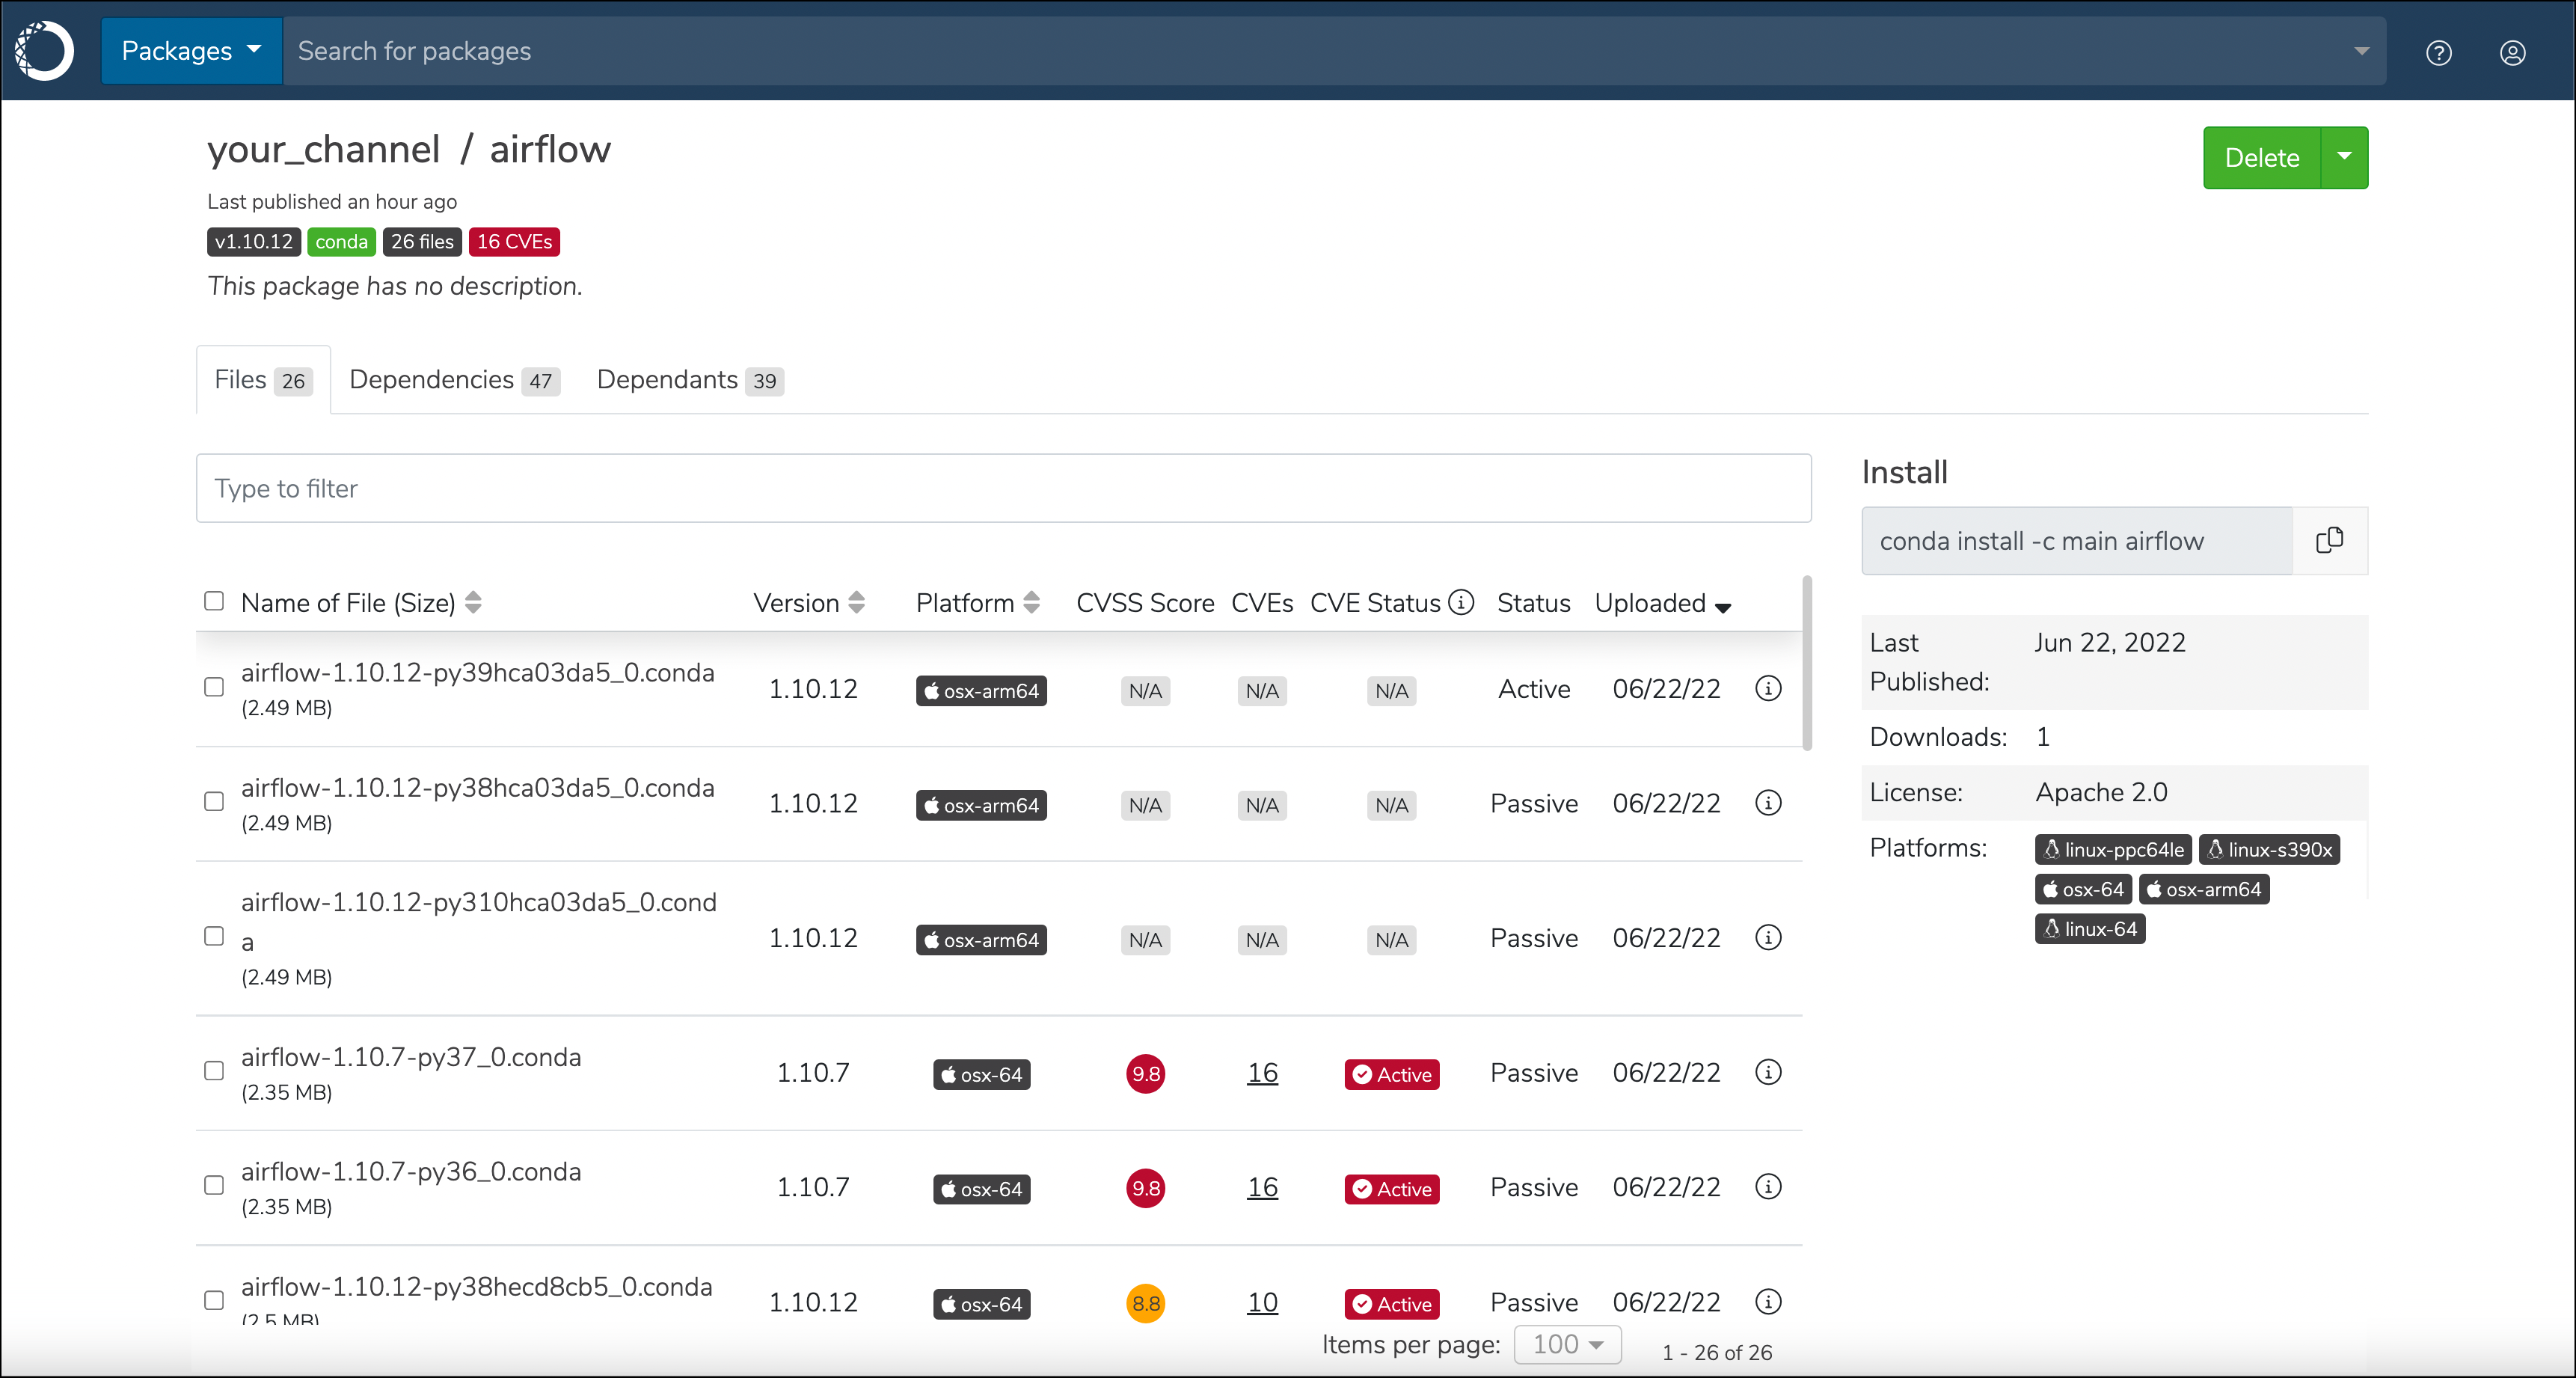
The CVSS score column shows the highest score of the associated active and reported CVEs. If no active or reported CVEs are found, the highest score for cleared, disputed, or mitigated CVEs are displayed.
Searching for CVEs
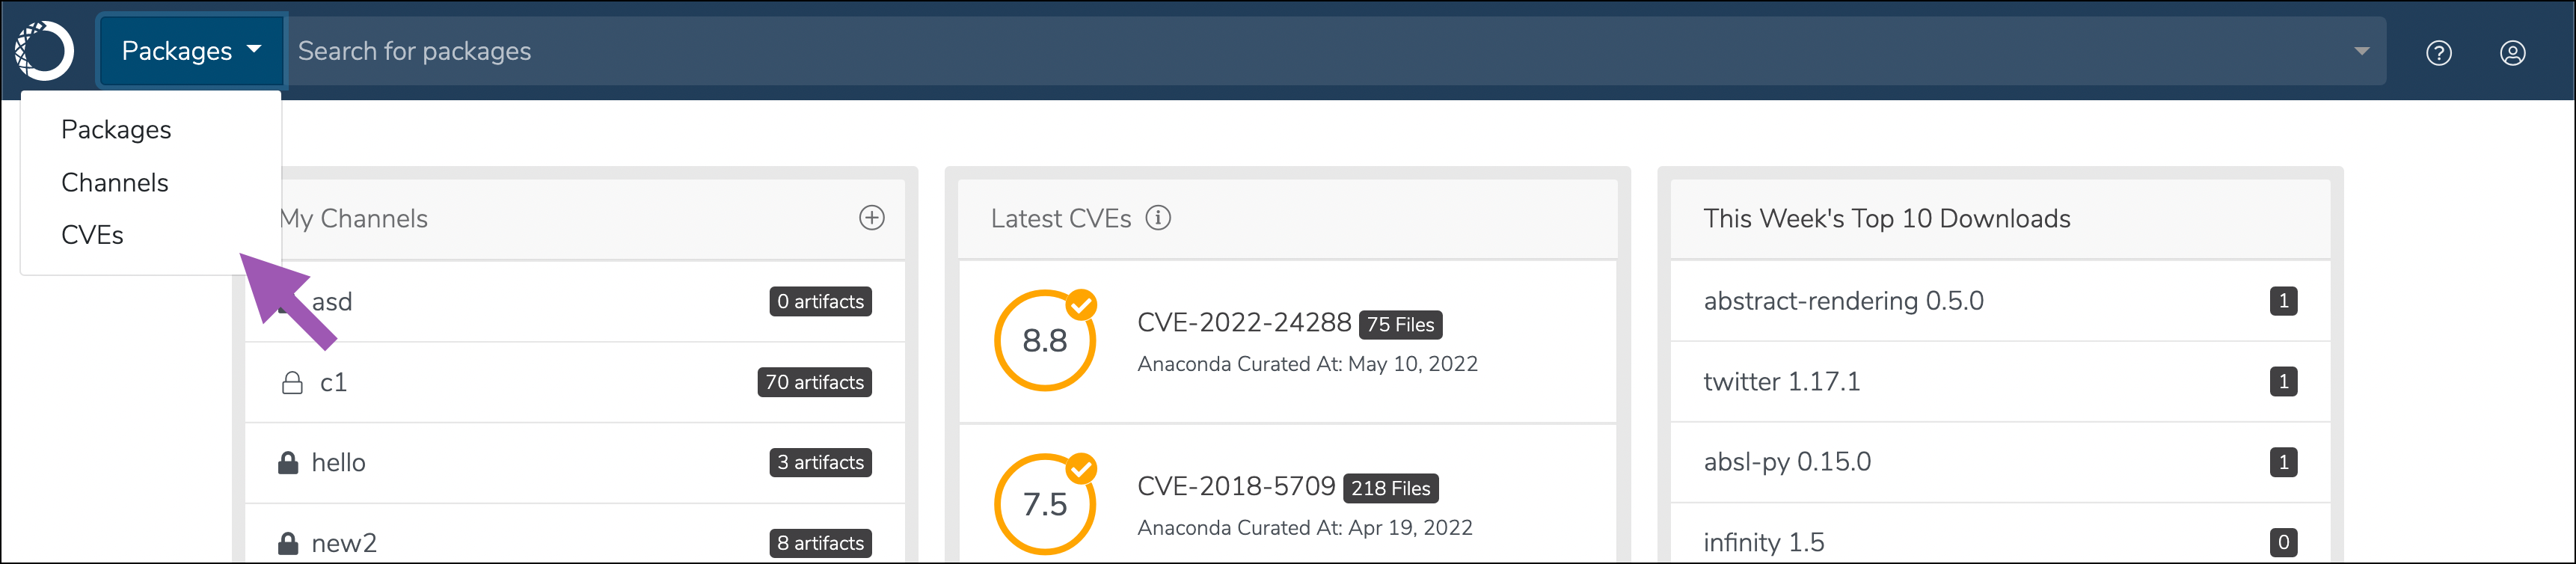
You can search for CVEs using the search bar at the top of the page. Open the drop-down menu in the upper-left corner and select CVEs, then type the name of the CVE you’re looking for in the search bar.
Listing the latest CVEs
As an administrator, you are able to view the latest published CVEs in multiple ways.
Via the UI:
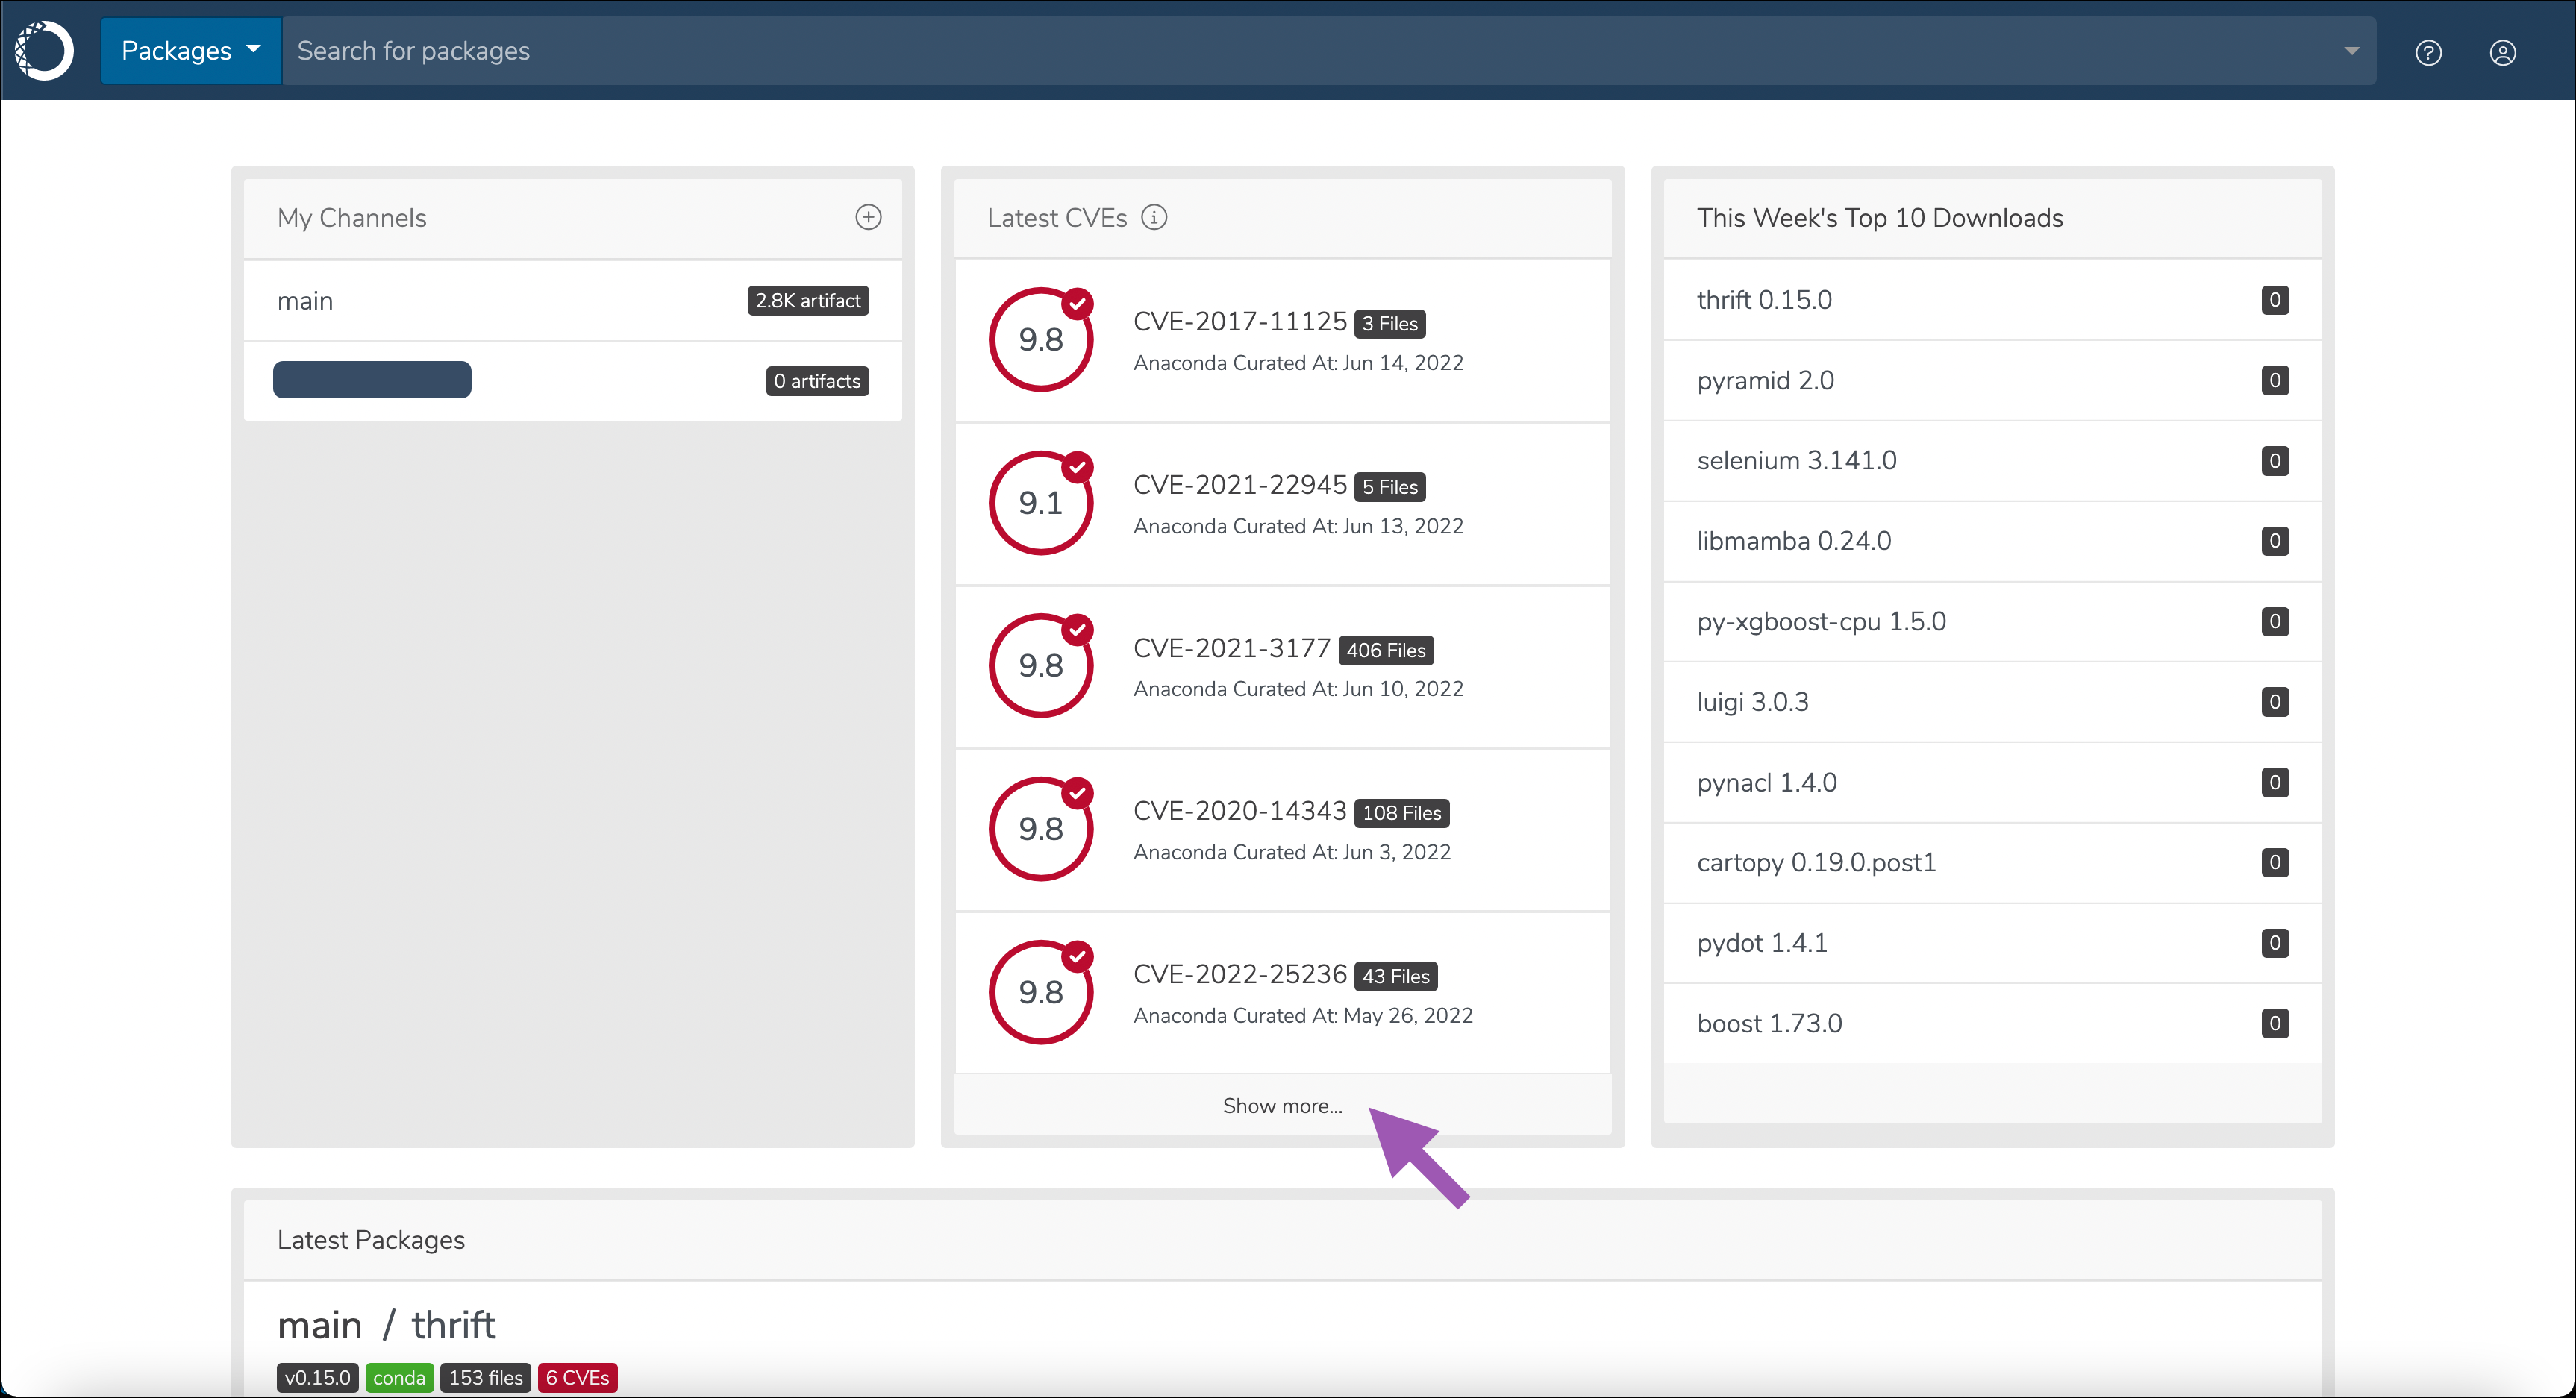
The latest CVEs are always listed on the dashboard. To view a complete list of CVEs, click Show more… at the bottom of the CVE column. From this view, CVEs are sorted by their Anaconda Curated date, followed by published CVEs that still require curation.
Viewing CVE details
You can view detailed information about a CVE and its dangers.
Via the UI:
From the CVE list view, select a CVE to view its details. You can view the CVSS 3 and CVSS 2 information here.

Via the CLI:
To view CVE details via the command line, run:
# Replace <CVE_ID> with the ID from the CVE.
conda repo cves --show <CVE_ID>
Updating CVEs and packages on an air-gapped server
Anaconda provides .zip files through Amazon Web Services (AWS) Simple Storage Service (S3) buckets. You can download the files you need on a whitelisted workstation with access to the internet, then move the files to the air-gapped network. Your public IP address is initially whitelisted during installation of Anaconda Server. If you need to whitelist a new IP address, contact Anaconda technical support.
Run the following command to download the .zip files:
curl -O https://anaconda-airgap-te.s3.amazonaws.com/conda_main.zip
curl -O https://anaconda-airgap-te.s3.amazonaws.com/cve.zip
Run the following commands to move your files to the correct location on your air-gapped network:
mv conda_main_airgap.zip /opt/anaconda/repo/airgap/
mv cve.zip /opt/anaconda/repo/airgap/
Note
This example assumes the default anaconda/repo/airgap file path as the storage location for the packages and CVEs. Your file path may be different.
The next time your mirror runs, your network will synchronize. You can start a mirror at any time if you want to synchronize immediately.