Channels and subchannels
Anaconda Team Edition contains channels and subchannels, which provide a location in the repository where you can look for artifacts that have been mirrored, uploaded, copied, or moved. Both administrators and users can define channels and subchannels, determine which artifacts are available in a channel or subchannel, and restrict or grant access to specific users or groups.
In Team Edition, we allow for an additional level within your channel, called a subchannel (previously called a label in anaconda.org).
When a user logs in to Team Edition for the first time, a user profile and default channel will be created. If a channel by that name already exists, a default channel will not be created for that user.
This topic provides guidance on the following actions:
Creating a channel
There are a few key things to note when creating a channel:
If a channel name is already in use, create a new channel with a different name. That channel can then be set as the default channel on the Settings page under My Account.
If an email is used as a username, the portion of the email before the “@” symbol (also known as the “local-part”) will be used as the username. Because channel names are restricted to a limited set of characters (a-z 0-9 - _), some characters may be replaced with
_. For example, if the email addresserica.lamara@website.comis used as a username, the channelerica_lamarawill be created.If you don’t see any way of creating a channel (as shown in the following UI section), you may be lacking the permission to do so. Ask your administrator about modifying your permissions to allow you to create channels.
Via the UI:
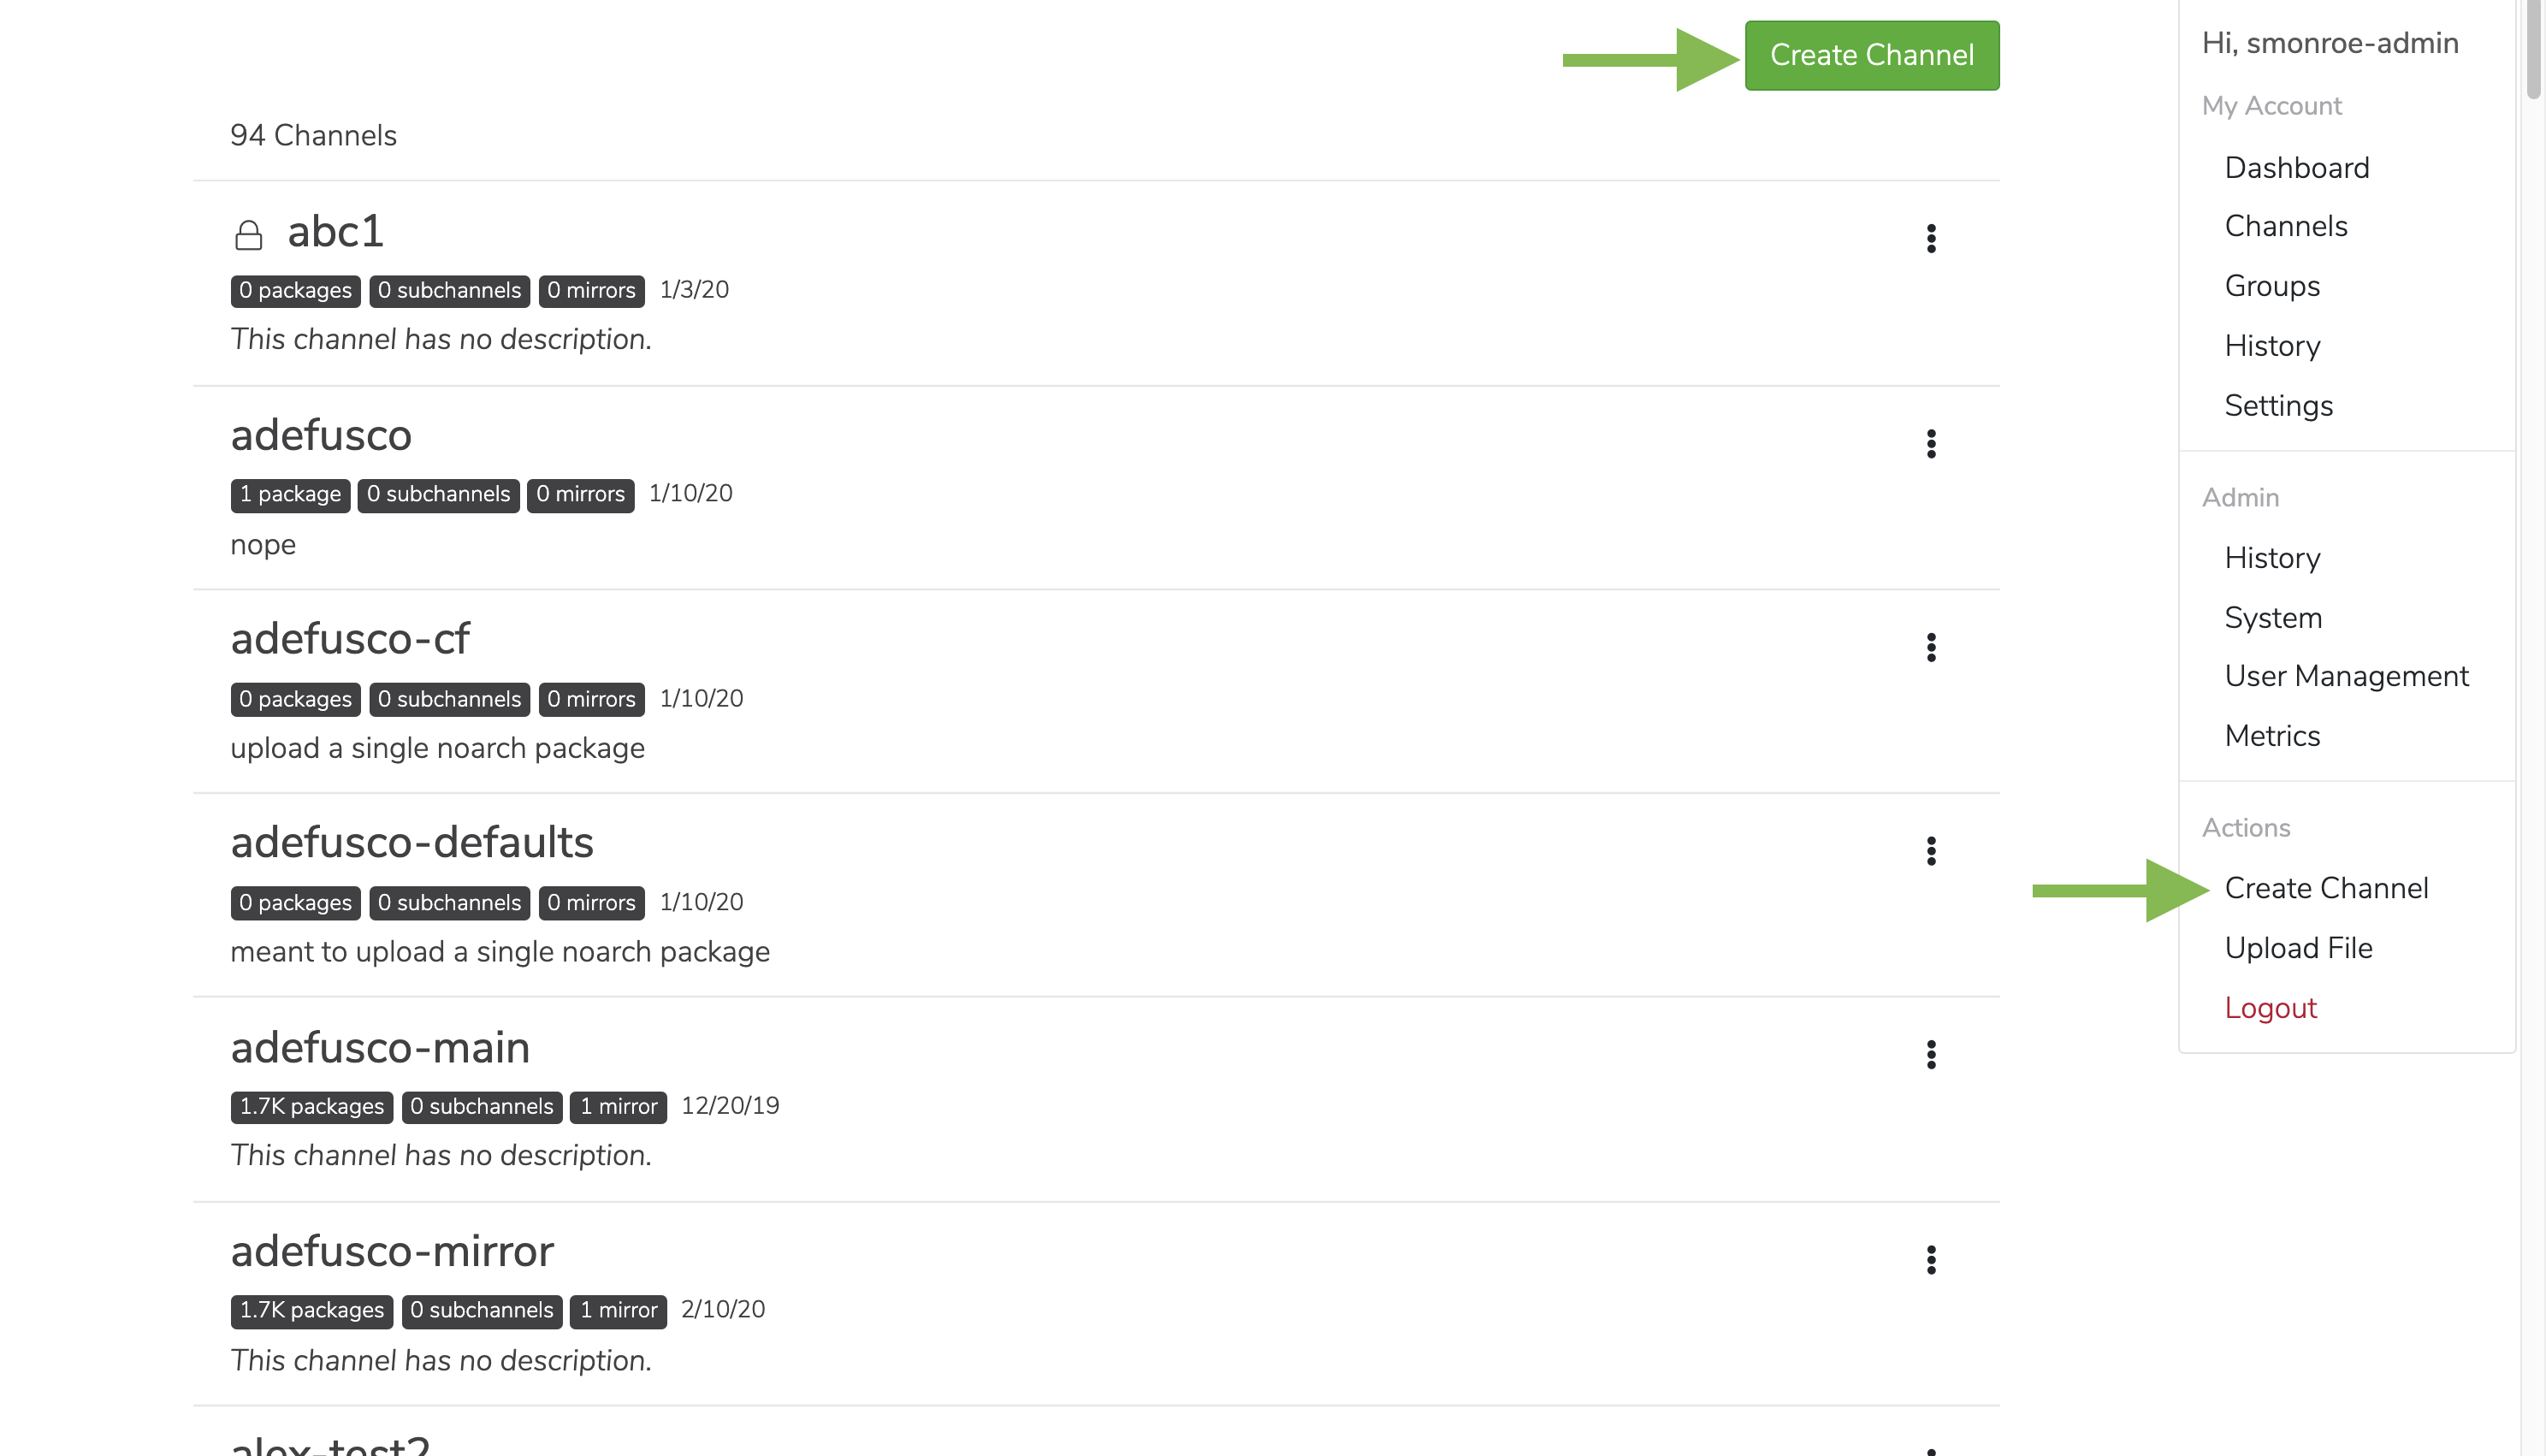
Click to open the User Menu (left click on the user icon in the header on the right side), and then click Create a Channel.
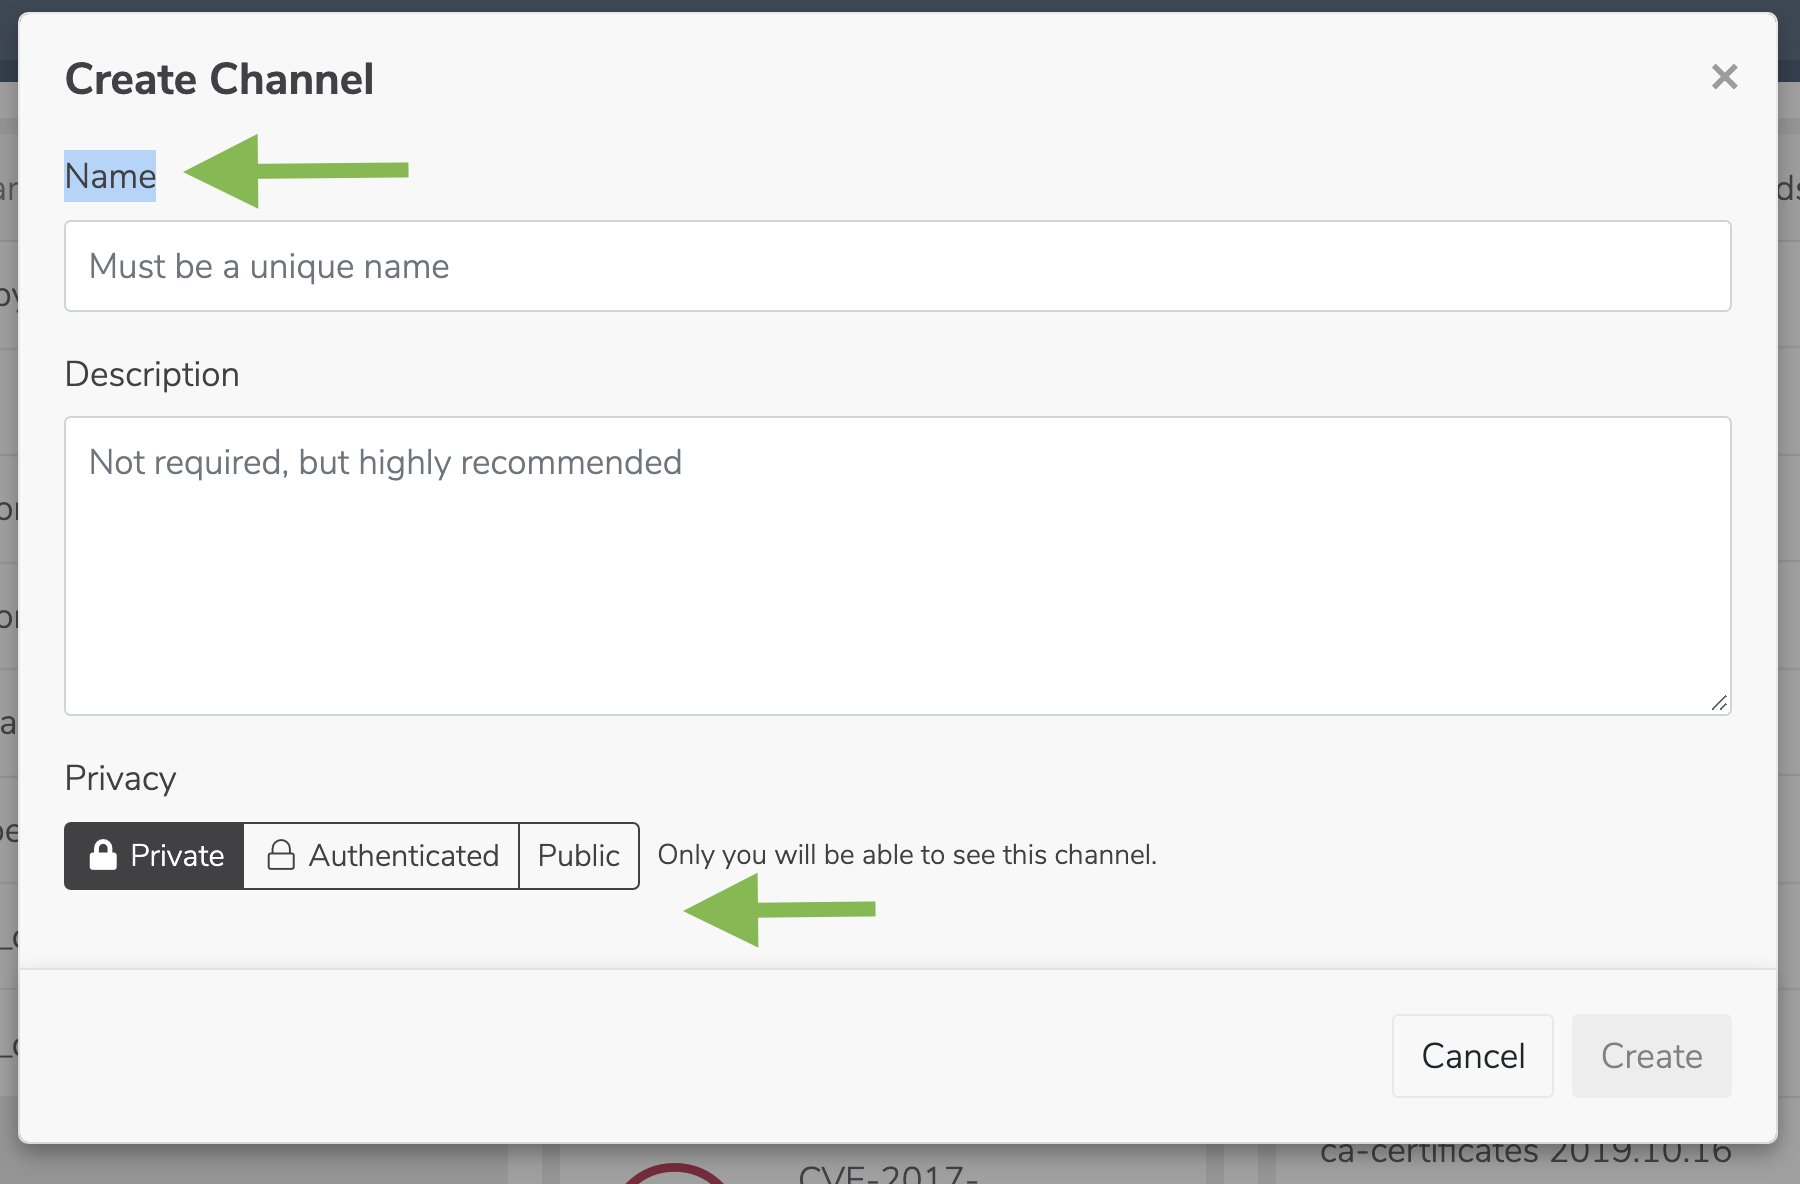
Fill in a name and description when prompted.
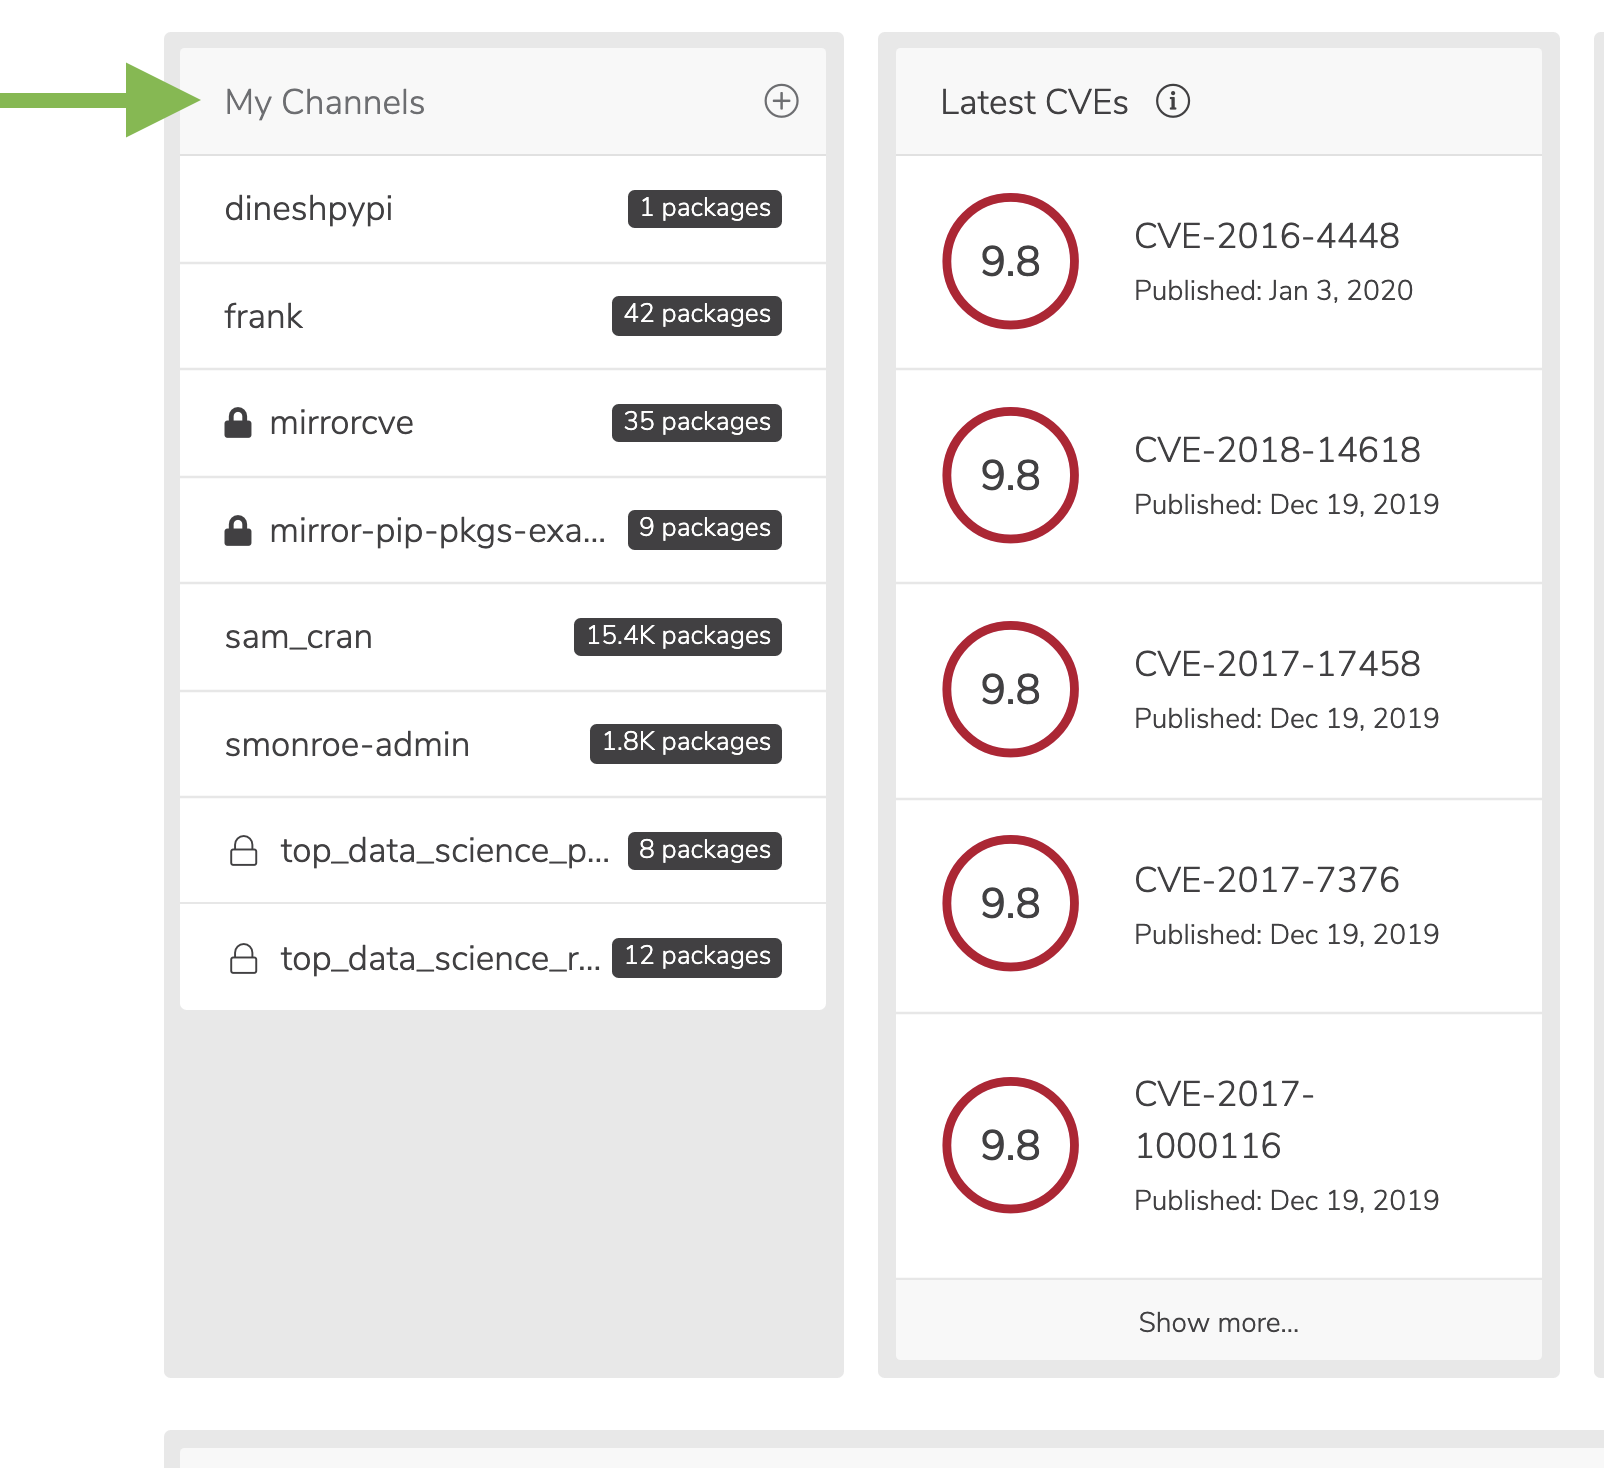
You can also create a new channel by clicking on the green button on the top right of the channels list page, or by clicking the plus + icon in the top right of the My Channels list on the dashboard page.
Via the API:
<DOMAIN>/swagger/ui/#/channels/repo.endpoints.channels.channels.post_channel
Via the CLI:
conda repo channel --create <CHANNEL_NAME>
Creating a subchannel
Via the UI:
Go to the details page of a channel.
You will notice a green button on the right side with an arrow to the right of it. Click that arrow, and then select Create subchannel.
Fill in a name and description when prompted.
Via the API:
POST /api/channels/<CHANNEL_NAME>/subchannels
Via the CLI:
conda repo channel --create <CHANNEL_NAME>/<SUBCHANNEL_NAME>
List channels you can access
Via the UI:
On the dashboard in the top left you will see a list of channels that you have access to. If you have more than 10 channels that you have access to, you can click the Show more button at the bottom of the list of channels. Private channels that you don’t have access to don’t show up.
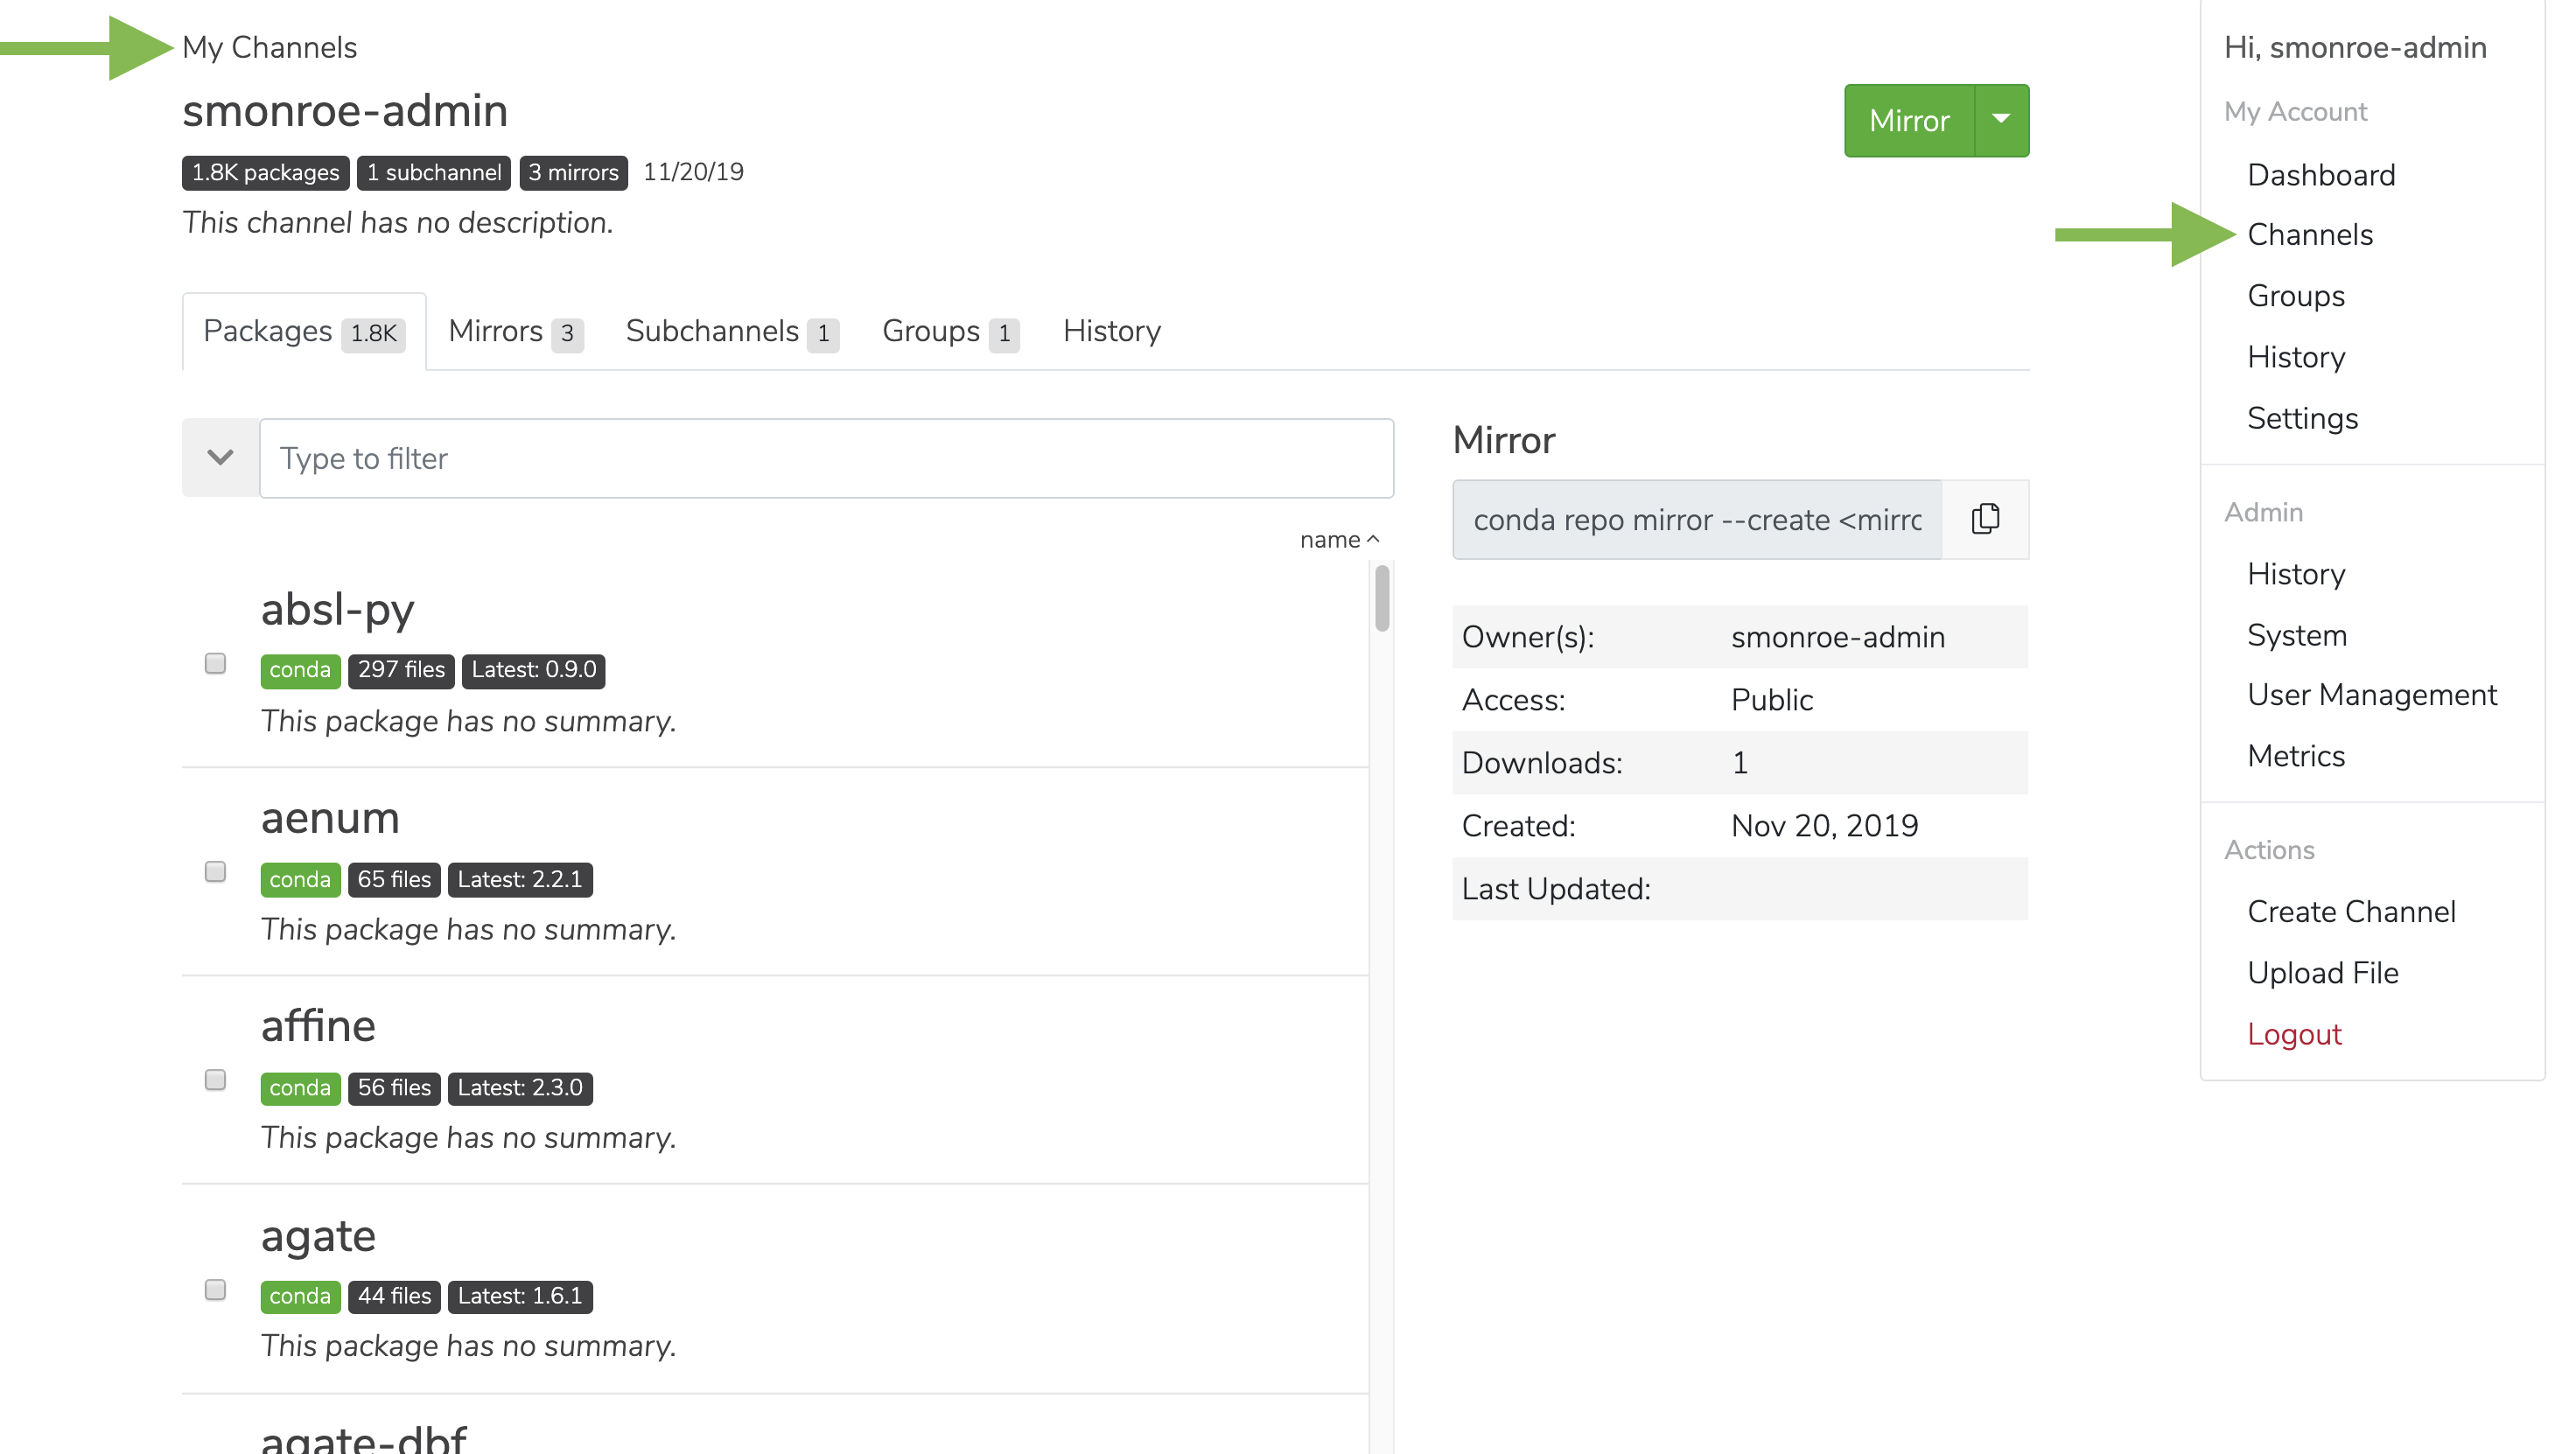
Alternatively, you can click on the user icon in the header and select Channels to get a list of channels that you own and have access to. If you are an administrator, you will see all channels in your organization.
Via the API:
GET /api/channels/

# or

GET /api/account/channels
Via the CLI:
conda repo channel --list
Viewing channel details
Inside each channel is metadata on the channel, such as the name and description. Additionally, you can get a list of packages, mirrors, subchannels, groups, and history.
Via the UI:
From the dashboard, click on the name of a channel. Alternatively, click on the user menu icon in the far right of the top navigation.
Select channels to see a list of all the channels you have access to, and then click through to view the details.
or
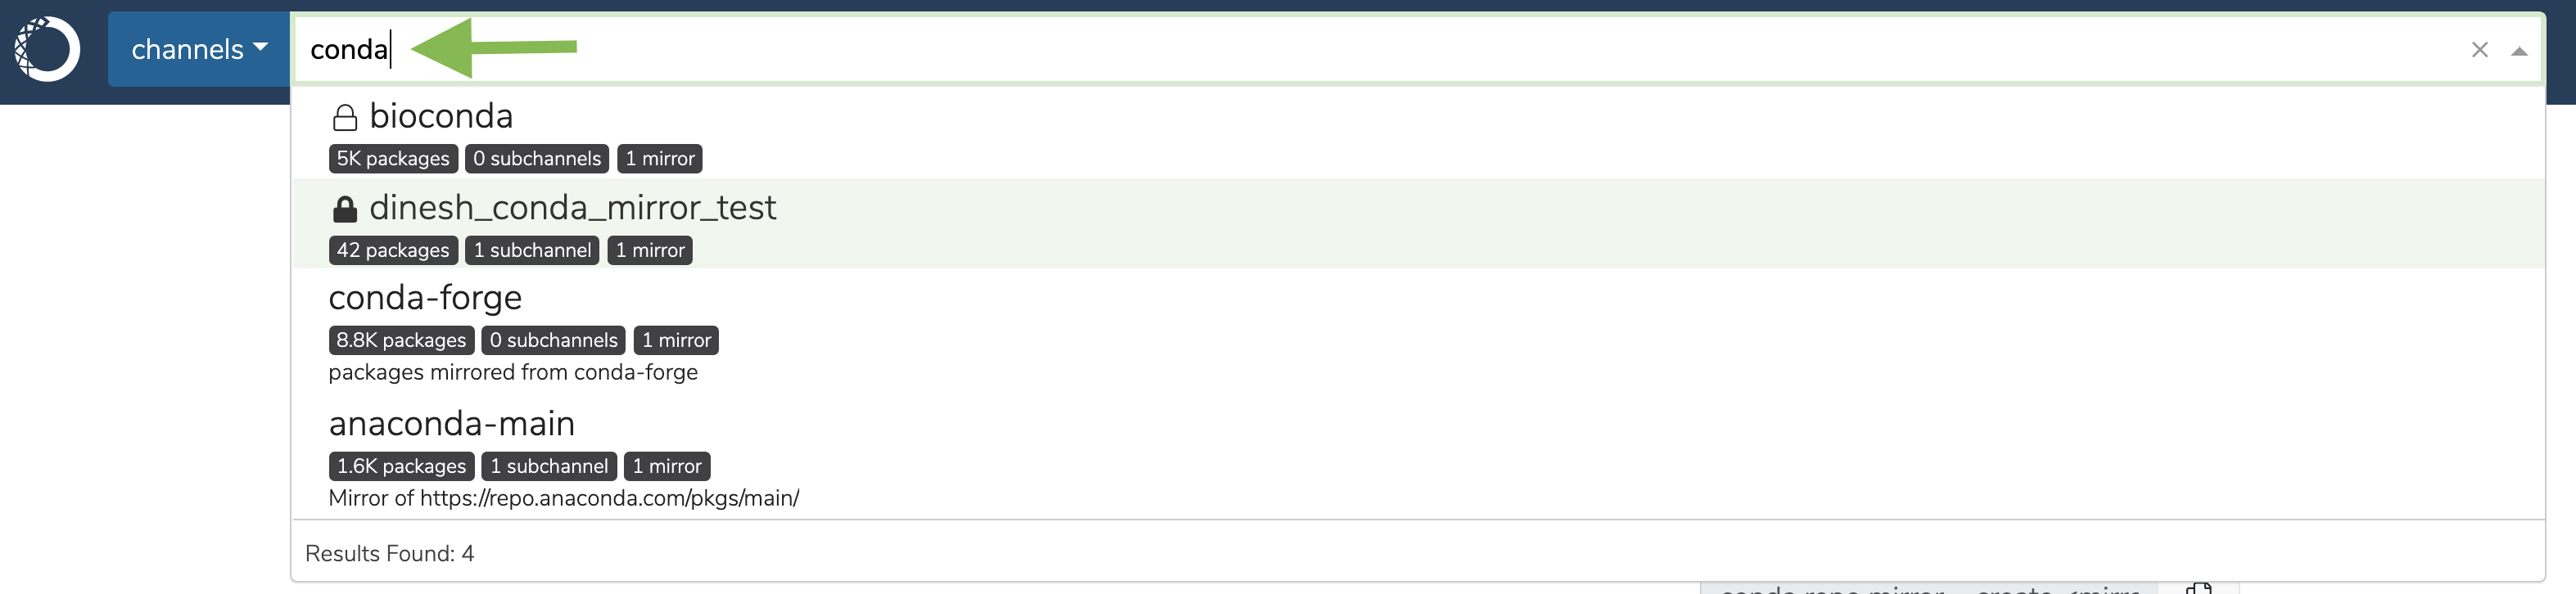
Type the name of the channel in the search bar at the top of the page and select it from the dropdown.
Via the API:
GET /api/channels/<CHANNEL_NAME>
GET /api/channels/<CHANNEL_NAME>/artifacts
GET /api/channels/<CHANNEL_NAME>/history
GET /api/channels/<CHANNEL_NAME>/mirrors
GET /api/channels/<CHANNEL_NAME>/subchannels
Via the CLI:
conda repo channel --show <CHANNEL_NAME>
conda repo channel --list-packages <CHANNEL_NAME>
conda repo channel --list-files <CHANNEL_NAME>
Viewing subchannel details
Inside each channel is metadata on the channel, such as the name and description. Additionally, you can get a list of packages, mirrors, subchannels, groups, and history.
Via the UI:
Go to the channel’s detail page and click on the Subchannels tab.
Click on the subchannel to see the subchannel details.
Via the API:
GET /api/channels/<CHANNEL_NAME>/subchannels/<SUBCHANNEL_NAME>
GET /api/channels/<CHANNEL_NAME>/subchannels/<SUBCHANNEL_NAME>/artifacts
GET /api/channels/<CHANNEL_NAME>/subchannels/<SUBCHANNEL_NAME>/history
GET /api/channels/<CHANNEL_NAME>/subchannels/<SUBCHANNEL_NAME>/mirrors
Via the CLI:
conda repo channel --show <CHANNEL_NAME>/<SUBCHANNEL_NAME>
conda repo channel --list-packages <CHANNEL_NAME>/<SUBCHANNEL_NAME>
conda repo channel --list-files<CHANNEL_NAME>/<SUBCHANNEL_NAME>
Editing a channel
Inside each channel is metadata on the channel that you can edit, such as the name, description, and privacy.
Via the UI:
From the dashboard, click on the name of a channel. Alternatively, click on the user menu icon in the far right of the top navigation.
Select channels to see a list of all the channels you have access to, and then click through to view the details.
On the channel details page, click the down arrow next to the large green button and select Edit from the menu.
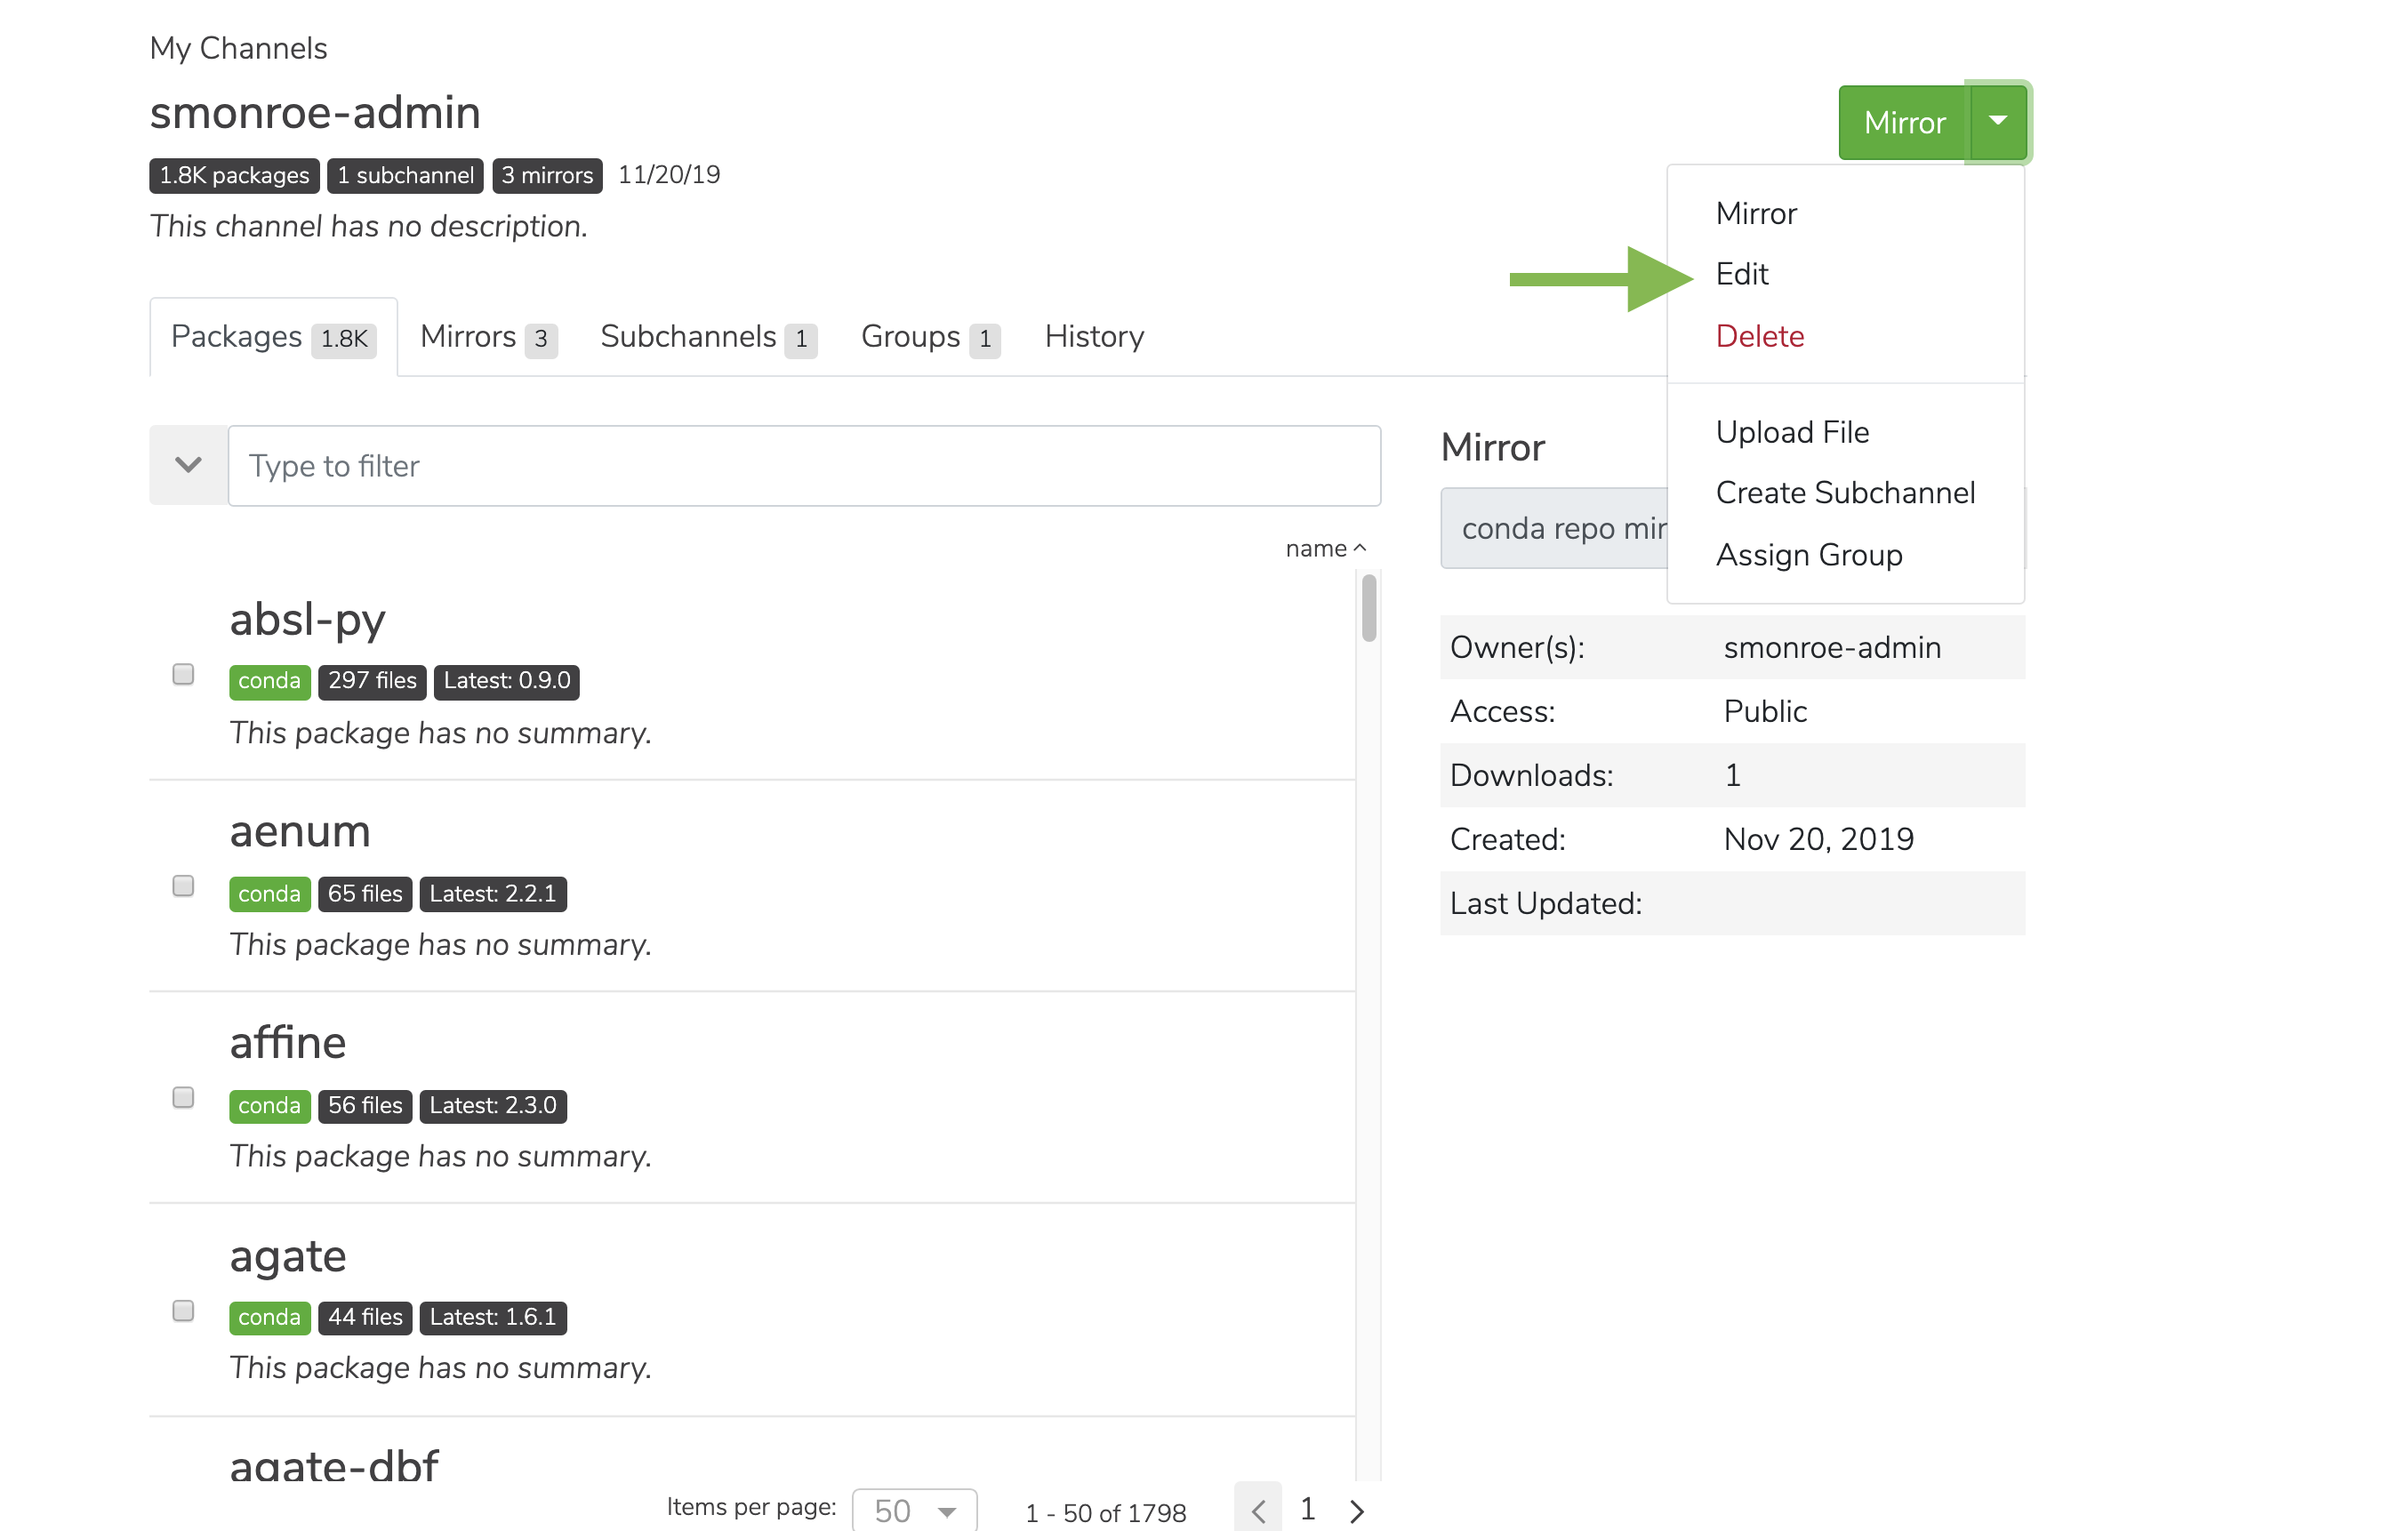
You will be presented with a modal in which you can edit the details of the channel.
Via the API:
PUT /api/channels/<CHANNEL_NAME>
Via the CLI:
# lock a channel (set the privacy to private)
conda repo channel --lock<CHANNEL_NAME>

# soft-lock a channel (set the privacy to authenticated)
conda repo channel --soft-lock <CHANNEL_NAME>

# unlock a channel (set the privacy to public)
conda repo channel --unlock<CHANNEL_NAME>
Editing a subchannel
Via the UI:
Go to a channel’s detail page and click on the Subchannels tab.
Click on the subchannel you wish to view details for.
On the subchannel details page, click the down arrow next to the large green button and select Edit from the menu.
You will be presented with a modal in which you can edit the details of the subchannel.
Via the API:
PUT /api/channels/<CHANNEL_NAME>/subchannels/<SUBCHANNEL_NAME>
Via the CLI:
# lock a subchannel (set the privacy to private)
conda repo channel --lock<CHANNEL_NAME>/<SUBCHANNEL_NAME>

# soft-lock a subchannel (set the privacy to authenticated)
conda repo channel --soft-lock <CHANNEL_NAME>/<SUBCHANNEL_NAME>

# unlock a subchannel (set the privacy to public)
conda repo channel --unlock<CHANNEL_NAME>/<SUBCHANNEL_NAME>
Creating a group
Click on the My account button in the top right.
In the dropdown, under My Account, select Groups.

On this page, you can see the groups that have already been created. Click the Create Group button to create a new group.
Enter a unique group name and description, then click Create.
Note
Members can be added to a group once it is created.
Adding members to a group
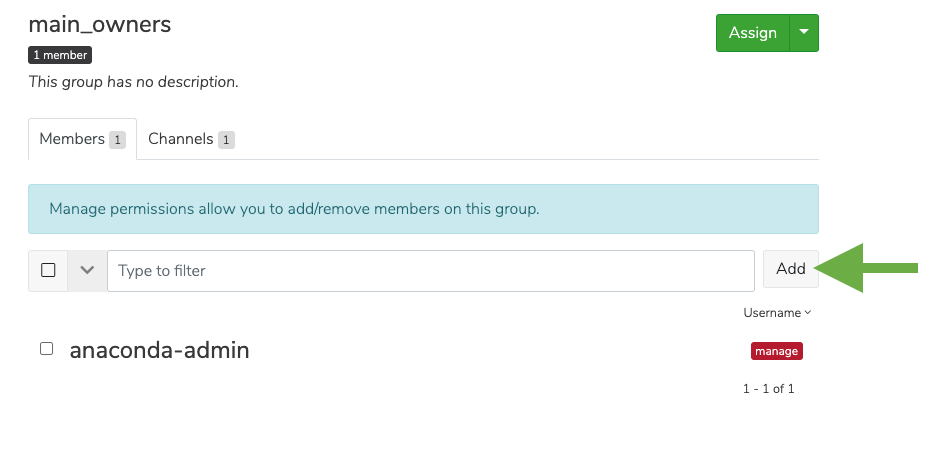
From the group page, click the Add button to add a new member to the group and assign member permissions.
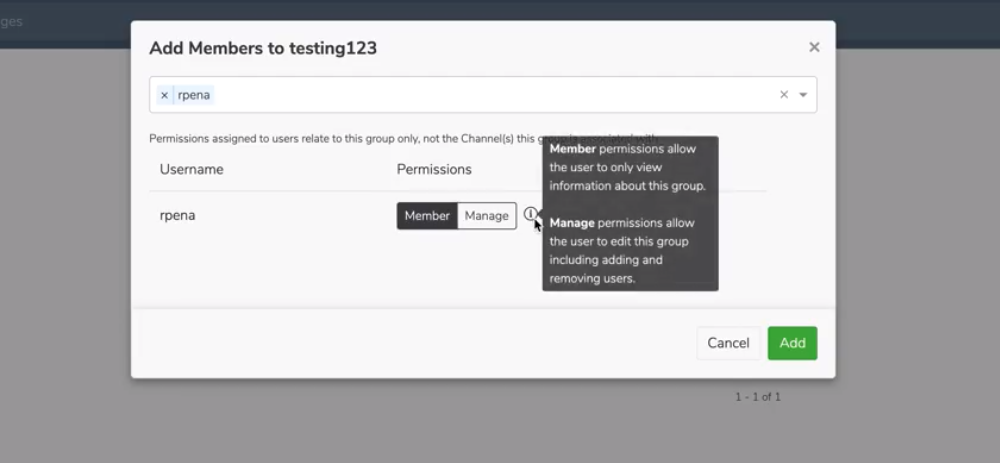
Once the member’s username has populated under Username, you can select their permission level. Click on the information icon next to the permissions to learn more about the permissions available.
Assigning a group to a channel
From the group page, click on the Channels tab.
If the group has yet to be assigned to a channel, the following notification will be displayed on the page:
Note
This group is not associated with any channels. Assign this group to a channel.
Click on Assign this group.
In the popup window, the dropdown search bar will list the channels to which you have permission to modify. Select the channel you wish to add your group to.
Then, select the permission you wish to assign to the group as a whole, and then click Add.
Deleting a channel
Deleting a channel marks the channel as deleted. Once you delete a channel, all associates artifacts will not be found in search. However, the files will remain on the disc. The ability to manipulate deleted channels and files will be possible in a future release of Team Edition.
Via the UI:
On a channel detail page click the green button’s down arrow to reveal other actions, then click Delete.
Alternatively, on the channels list page, you can click the elipses icon … on the right of each channel row and choose Delete.
Via the API:
DELETE /api/channels/<CHANNEL_NAME>
Via the CLI:
conda repo channel --remove <CHANNEL_NAME>
Deleting a subchannel
Via the UI:
On a channel detail page, click on the subchannels tab. Select one or more subchannels, and then select the down arrow next to the filter text field. A menu will appear where you can select Delete to delete the selected Subchannels.
Alternatively, you can click on a subchannel to view its detail page. From there, click on the green button’s down arrow to reveal other actions, then click Delete.
Via the API:
DELETE /api/channels/<CHANNEL_NAME>/subchannels/<SUBCHANNEL_NAME>
Via the CLI:
conda repo channel --remove <CHANNEL_NAME>/<SUBCHANNEL_NAME>