Common Vulnerabilities and Exposures (CVEs)
CVEs are Common Vulnerabilities and Exposures found in software components. Because modern software is complex with its many layers, interdependencies, data input, and libraries, vulnerabilities tend to emerge over time. Ignoring a high CVE score can result in security breaches and unstable applications. Read our blog post on CVEs to learn more.
Software developers refer to CVE databases and scores on a regular basis to minimize the risk of using vulnerable components (packages and binaries) in their applications or web pages. They also monitor for vulnerabilities in components they currently use. To reduce the risk of a security breach from open-source packages, data science teams need to take this page from the software developer’s playbook and apply it to their data science and machine learning pipeline.
When an administrator is looking to minimize the risk of a model the team is developing they are going to want to filter out packages and files with known vulnerabilities that are above a certain threshold. Anaconda Team Edition allows the administrator to decide which filters to apply and who will have access to the filtered channels and packages. This level of security and governance allows the team to focus on building their model.
This topic provides guidance on the following actions:
Understanding CVEs
CVE scores
Severity scores are assigned based on the numerical Common Vulnerability Scoring System (CVSS) on a zero to ten scale.
CVSS score |
Qualitative Rating |
0 |
None |
0.1 - 3.9 |
Low |
4.0 - 6.9 |
Medium |
7.0 - 8.9 |
High |
9.0 - 10 |
Critical |
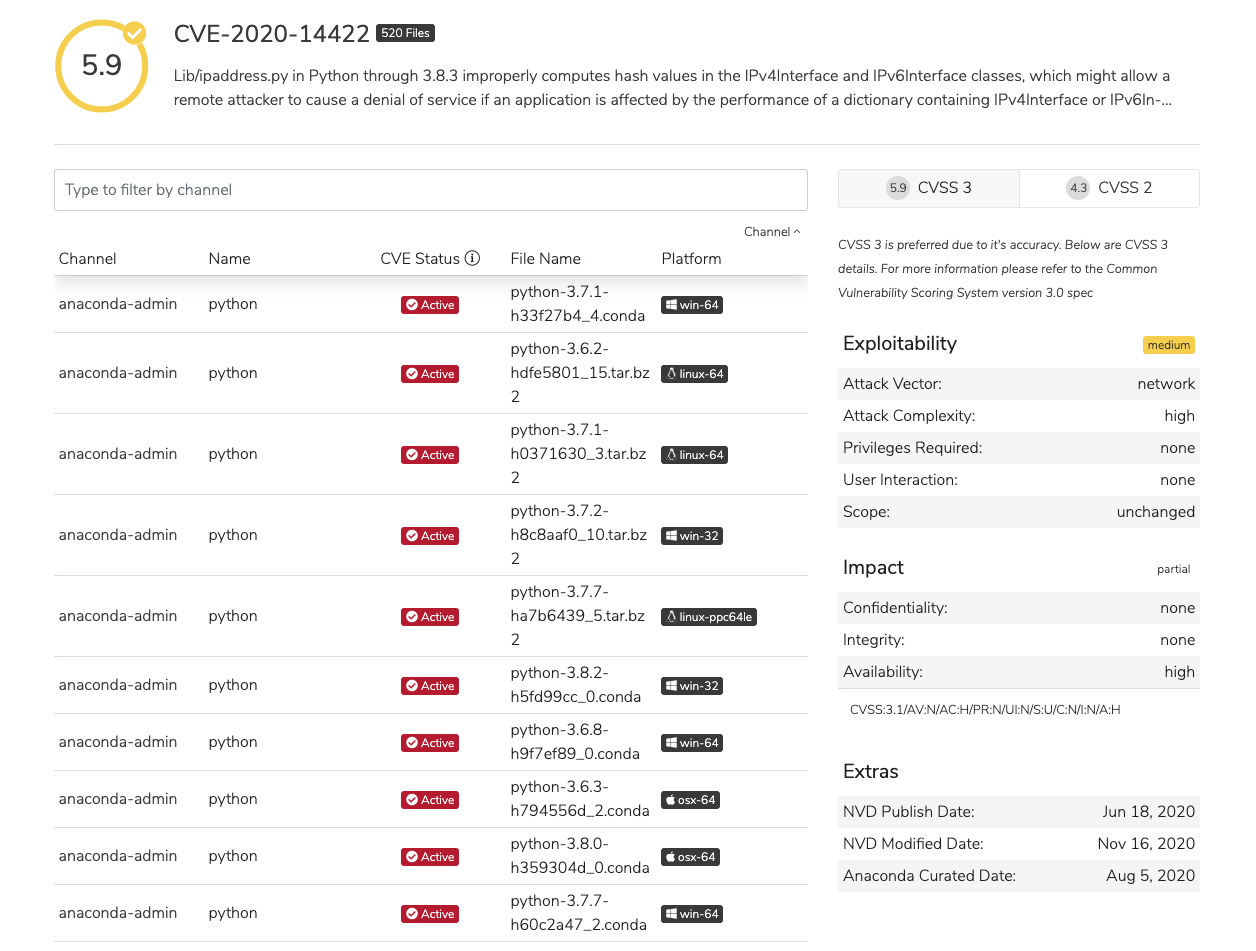
CVSS 3 and CVSS 2
While both CVSS 3 and CVSS 2 scores and details can be reviewed by clicking through to a specific CVE, CVSS 3 is presented on the dashboard because it provides a more comprehensive view of CVEs. This is due to two added metrics: Scope and User Interaction.
Scope — captures whether a vulnerability in one vulnerable component impacts resources in components beyond its security scope.
User Interaction — captures the requirement for a human user, other than the attacker, to participate in the successful compromise of the vulnerable component.
For more information about CVE scoring, visit NVD.
CVE curation
The CVE curation process can be summarized in four steps:
Anaconda sources Team Edition’s CVE information from the National Institute of Standards and Technology(NIST) National Vulnerability Database (NVD).
From there, NVD CVE information is matched with the package names and versions in the Anaconda repository.
Each auto-matched CVE is examined for accuracy by Anaconda staff. The CVEs get one or more reviews to categorize, refine, and improve the reported information.
The refined CVE metadata allows you to learn more about each vulnerability and filter out OSS packages that don’t meet your security requirements.
Note
After your license is applied, CVEs are automatically applied, brought in to the system, and updated hourly.
In the following topic, you can see how this applies to mirrors.
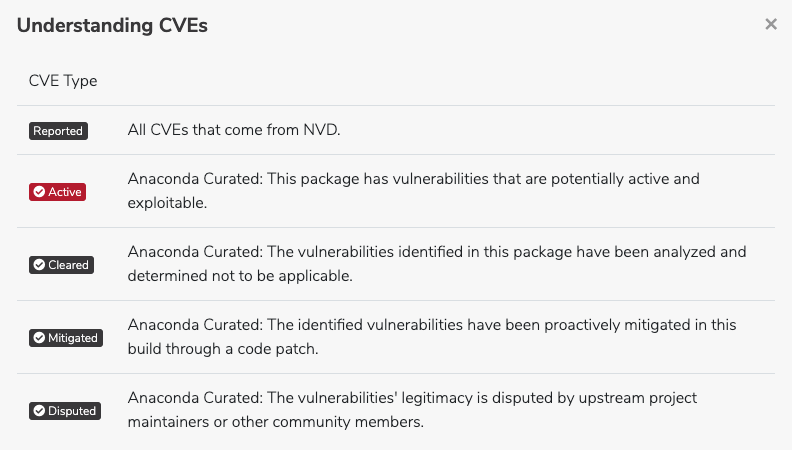
CVE statuses
CVE descriptions include one of five CVE status categories. “Reported” is a CVE from NIST that has not been reviewed by the Anaconda Team. All other categories have been curated and their labels feature a check mark:

The number beside the CVE name indicates the number of files affected in the organization. N/A indicates no associated CVEs.
Click on the information icon beside CVEs (located throughout Team Edition) to view descriptions of CVE statuses.
CVE labels and tabs
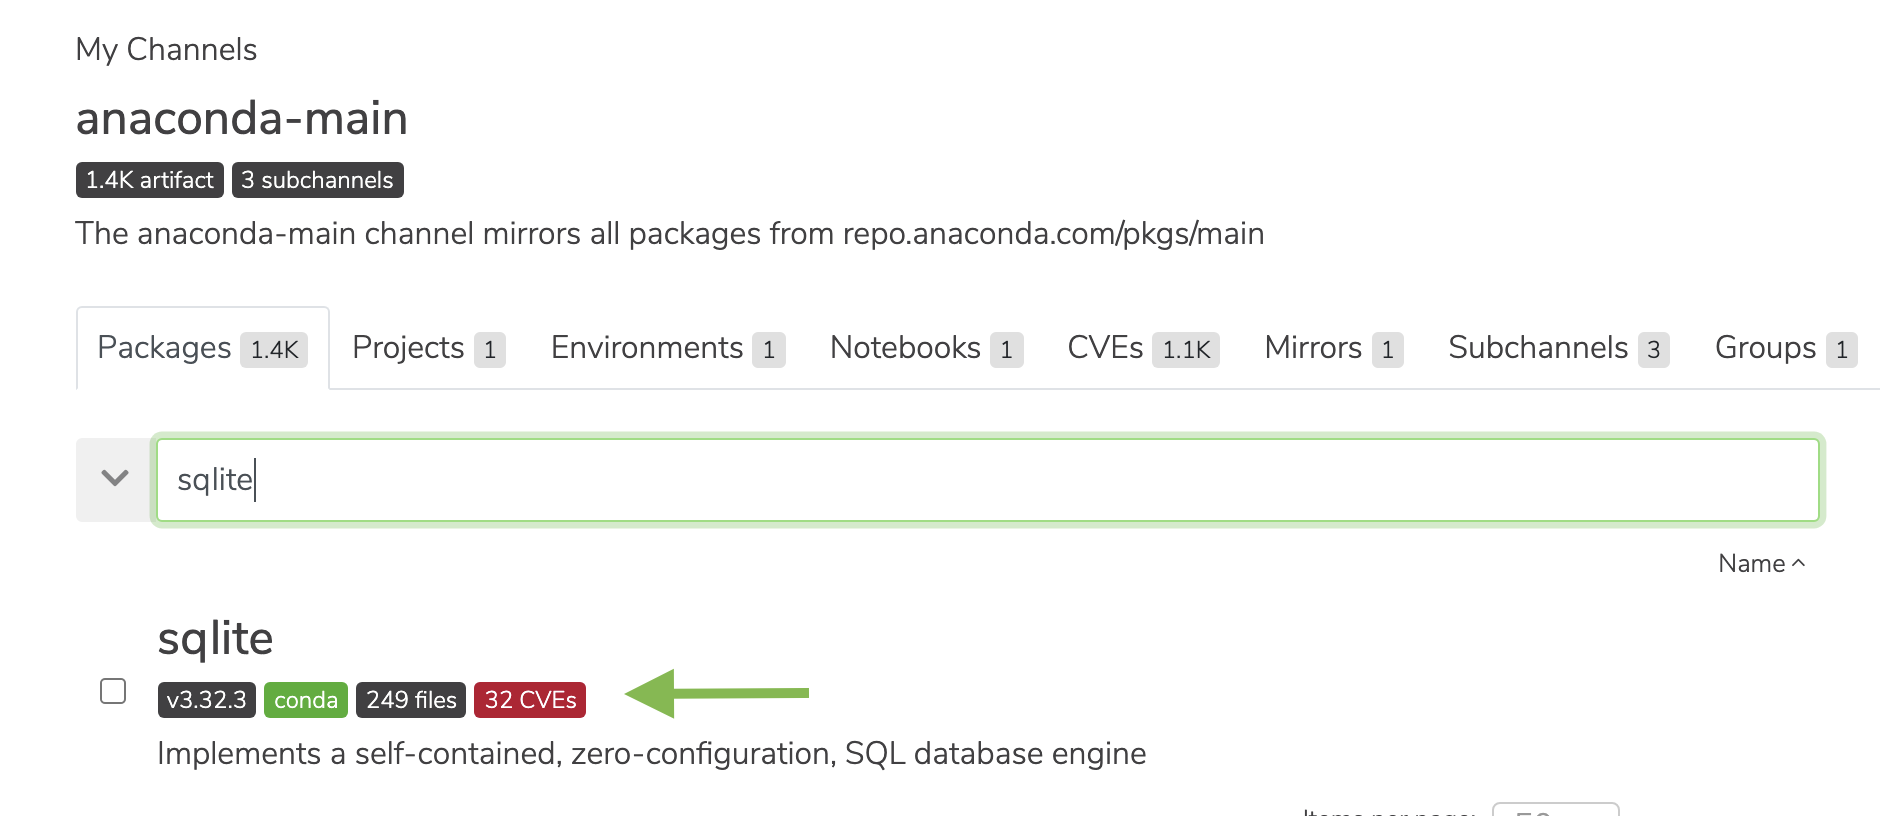
The number located on the CVE tab only indicates the number of CVEs pertaining to the packages within that channel:

Packages have a CVE tag indicating how many CVEs are associated with that specific package:
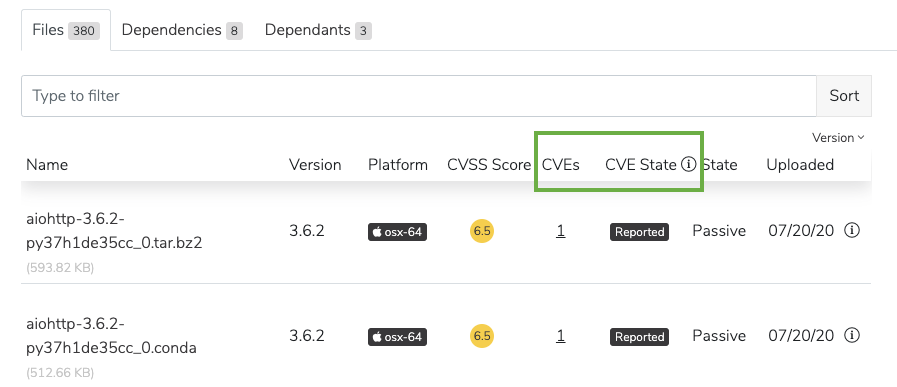
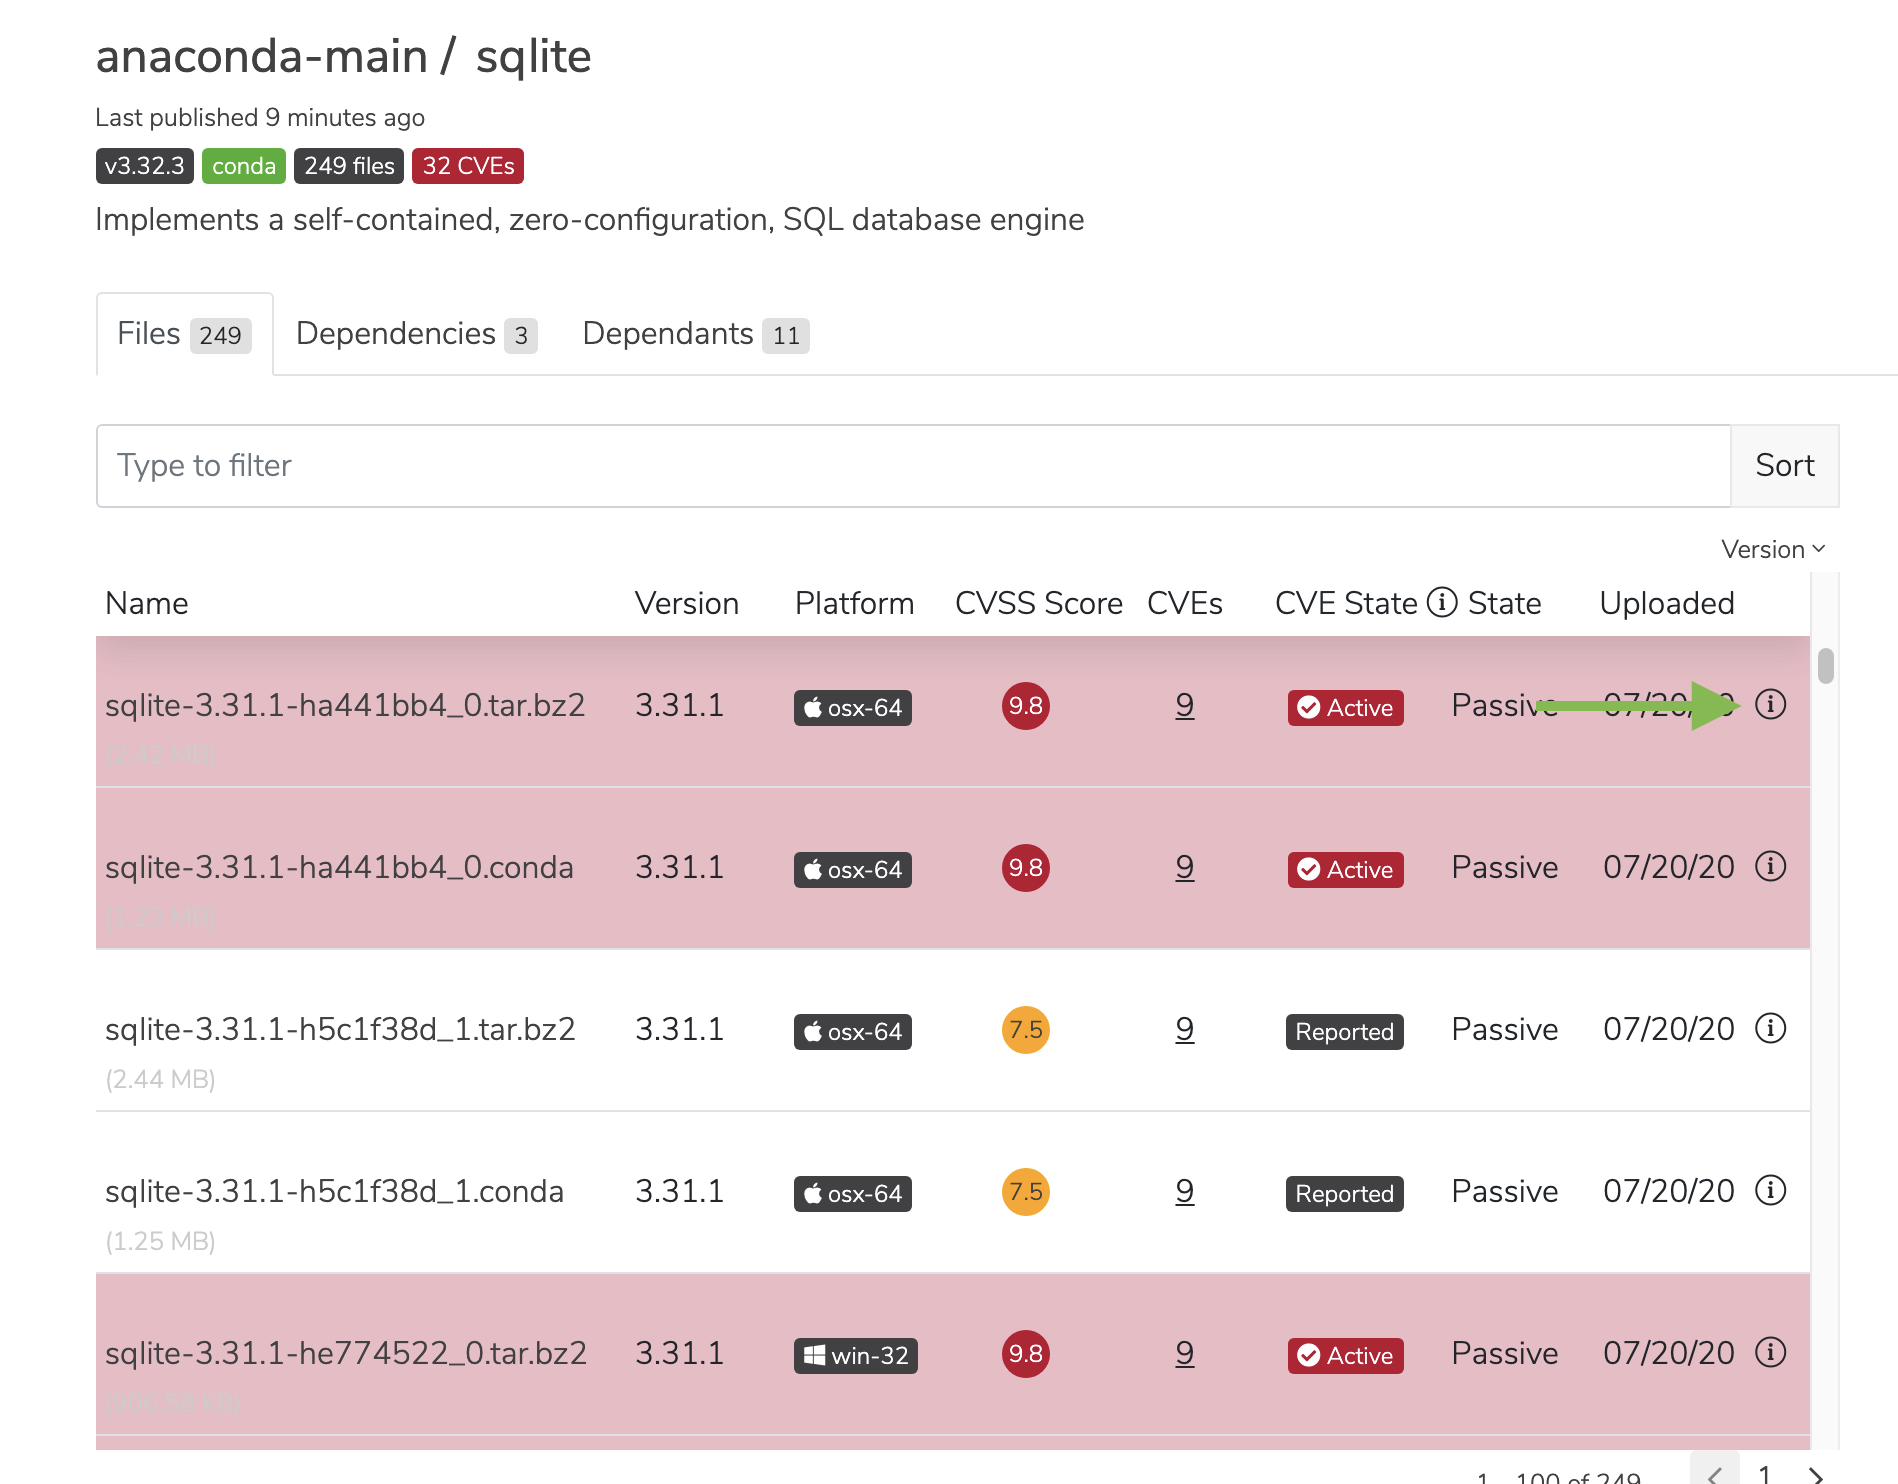
The CVEs and CVE State columns on artifact pages show the number of CVEs associated with that file and CVE status, respectively. The State column shows whether the mirror is active or passive.
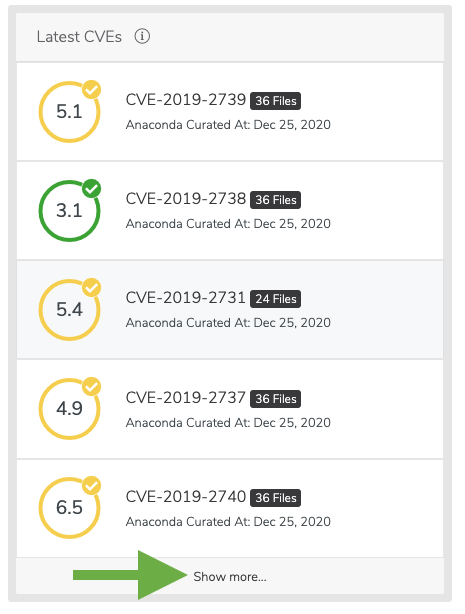
Listing the latest CVEs
As an administrator, you are able to view the latest published CVEs.
Via the UI:
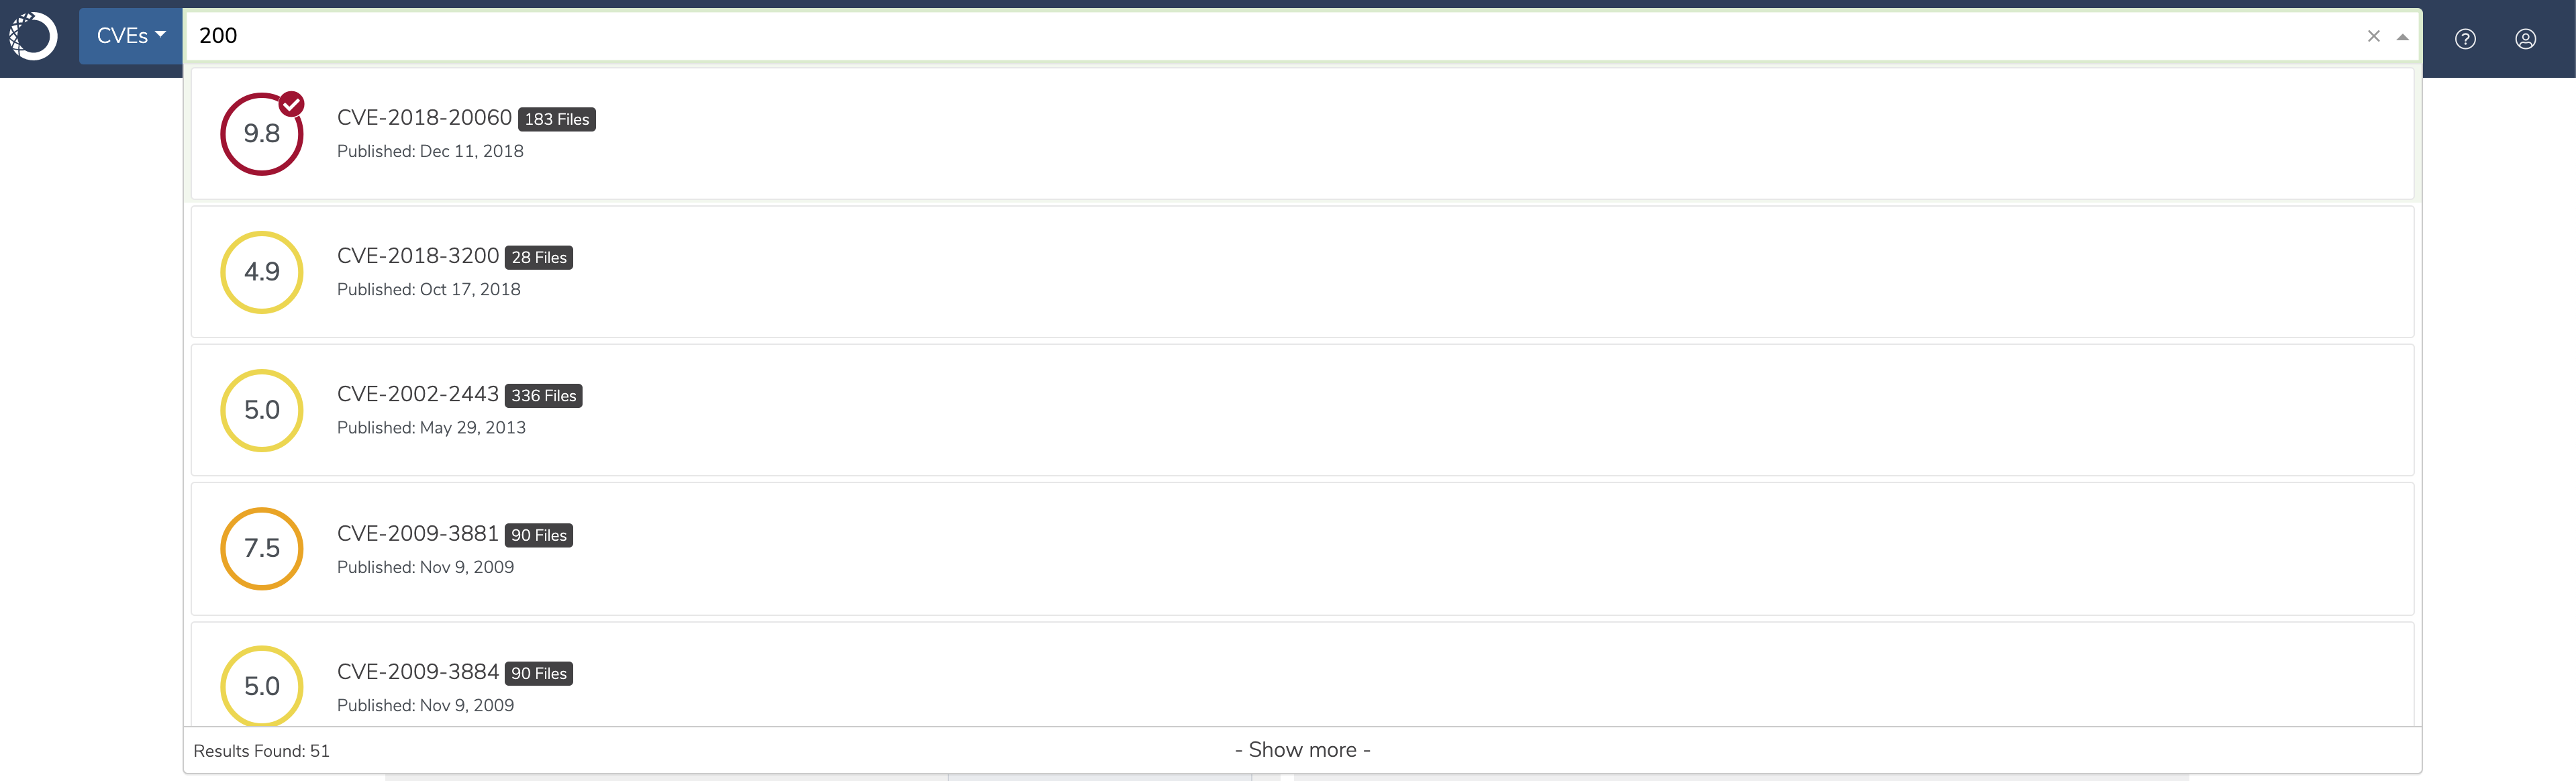
You can view a list of the latest CVEs at the top of the dashboard. Additionally, you can click Show more at the bottom of the list to view a larger list of CVEs. CVEs are sorted by their Anaconda Curated date, followed by published CVEs that have yet to be curated.
You can also search for CVEs in the search bar at the top of the page.
Via the API:
GET /api/cves
Via the CLI:
conda repo cves --list
Viewing the details of CVEs
Tip
All users have the ability to view CVEs as long as the admin has assigned the cve:manage role to users.
Via the UI:
You can view a list of the latest CVEs at the top of the dashboard. Additionally, you can click Show more at the bottom of the list to view a larger list of CVEs. From there, click an individual CVE to view further details.
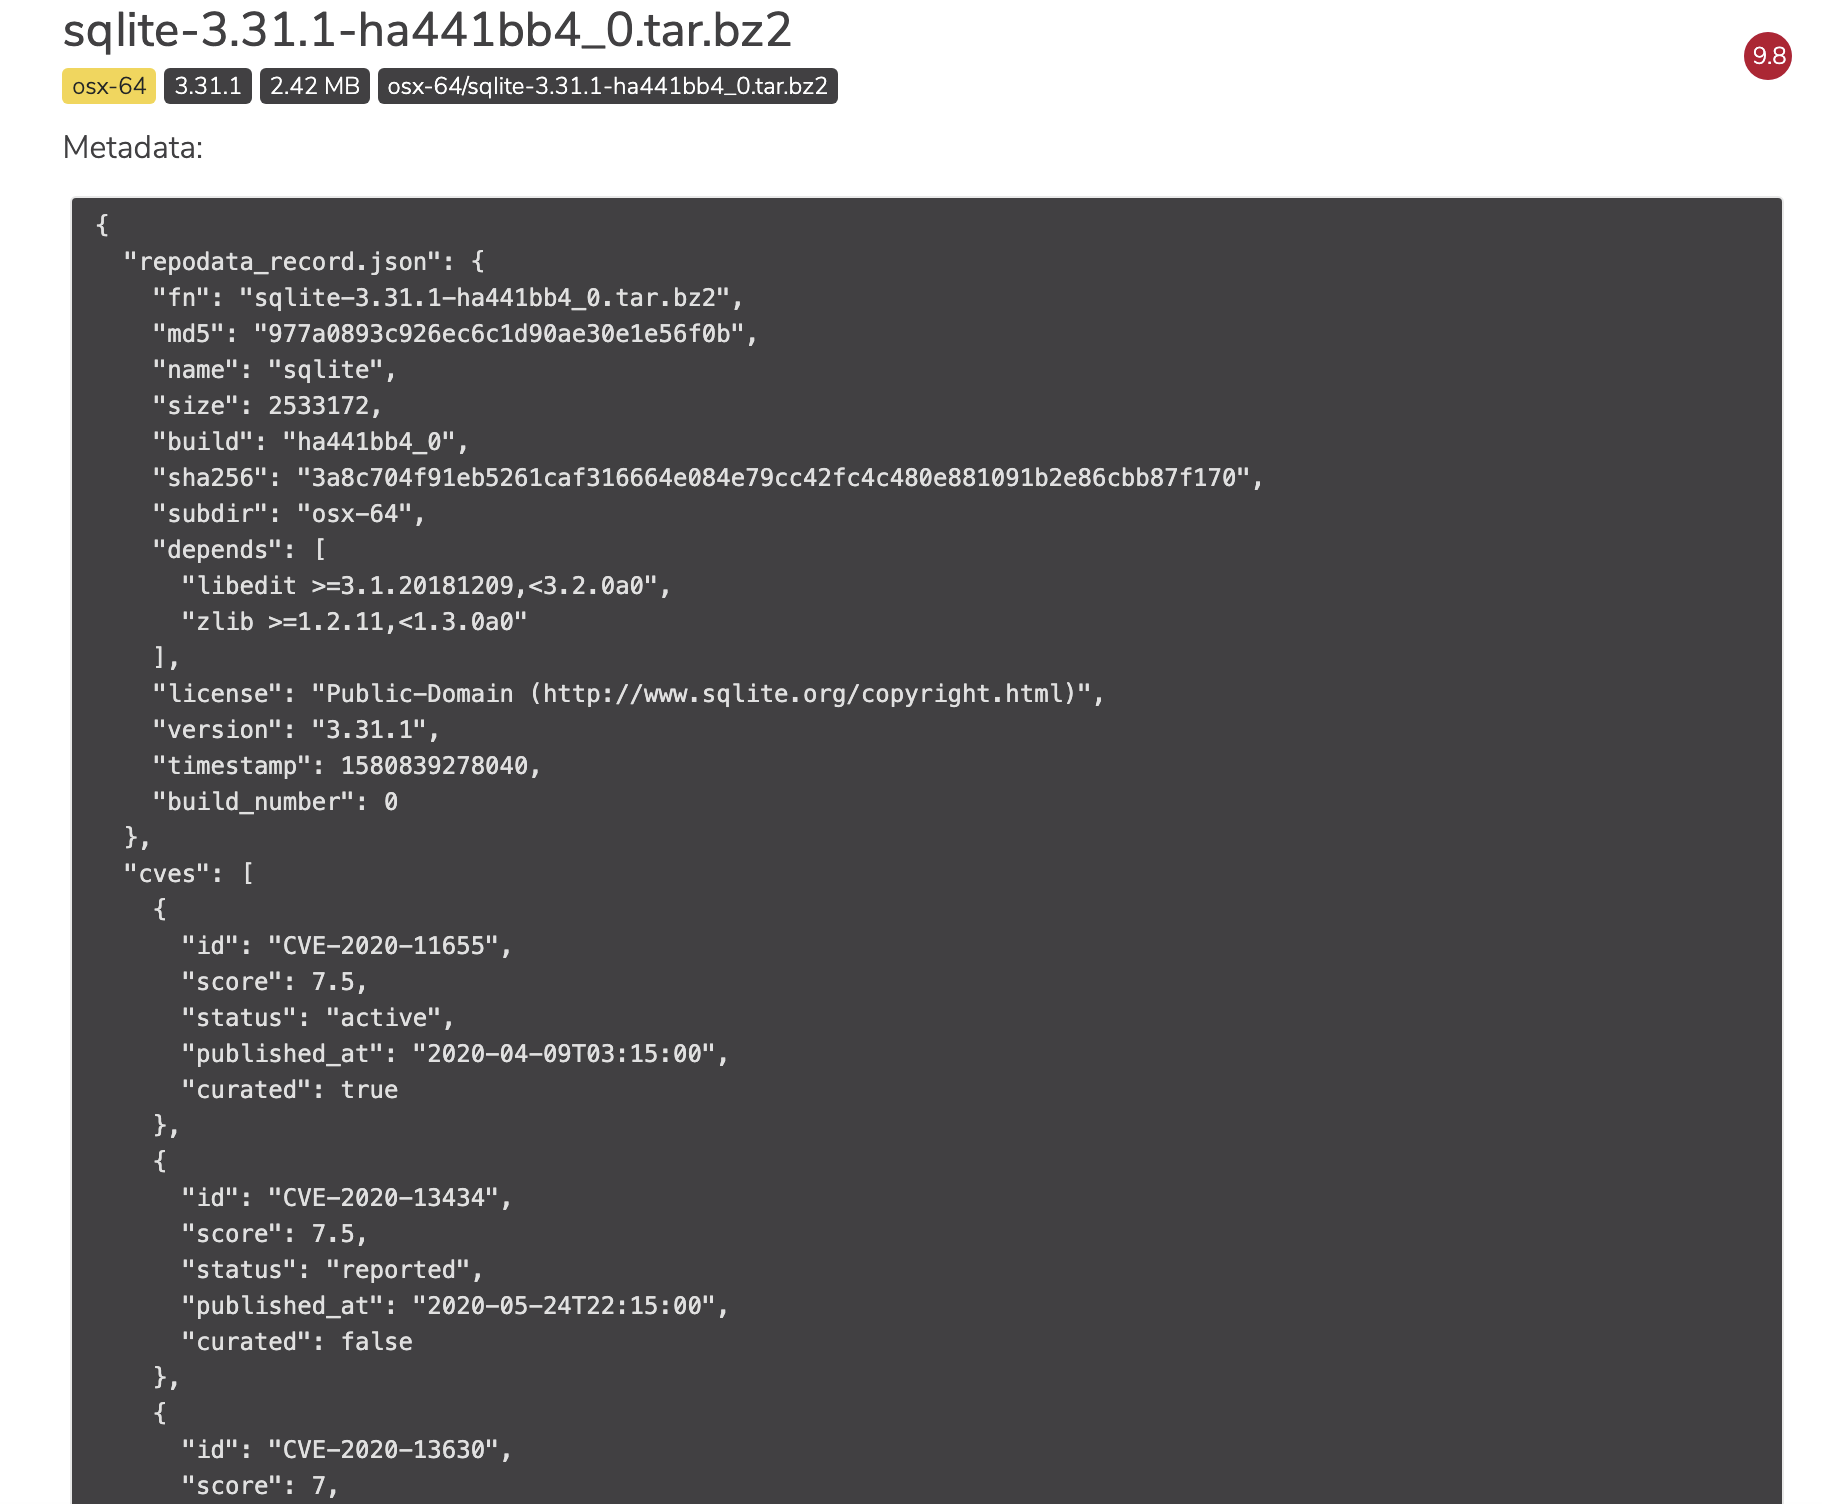
To view the metadata of a CVE, click on the information icon beside its upload date.
You will be presented with the CVE’s metadata.
Via the API:
# Replace <CVE_ID> with the ID from the CVE.
GET /api/cves/<CVE_ID>
Via the CLI:
# Replace <CVE_ID> with the ID from the CVE.
conda repo cves --show <CVE_ID>