Updating your domain
If you wish to change your domain—for instance, if you accepted the default domain temporarily until you knew the correct domain—then you need to make the change in Anaconda Team Edition and Keycloak for the change to truly take effect.
This topic provides guidance on the following actions:
Updating the domain in Team Edition
To update the domain in Team Edition, you need to update the domain environment variable:
Make a copy of the old
.envfile for reference and/or recovery purposes:cp .env .env.old
Open the
.envfile, located in the same directory as thedocker-compose.ymlfile.Update the
<DOMAIN>variable to your new domain.
Note
If you have existing clients (tools) configured to use the Team Edition instance using the old DNS name, you will need to update those clients as well.
Updating the domain in Keycloak
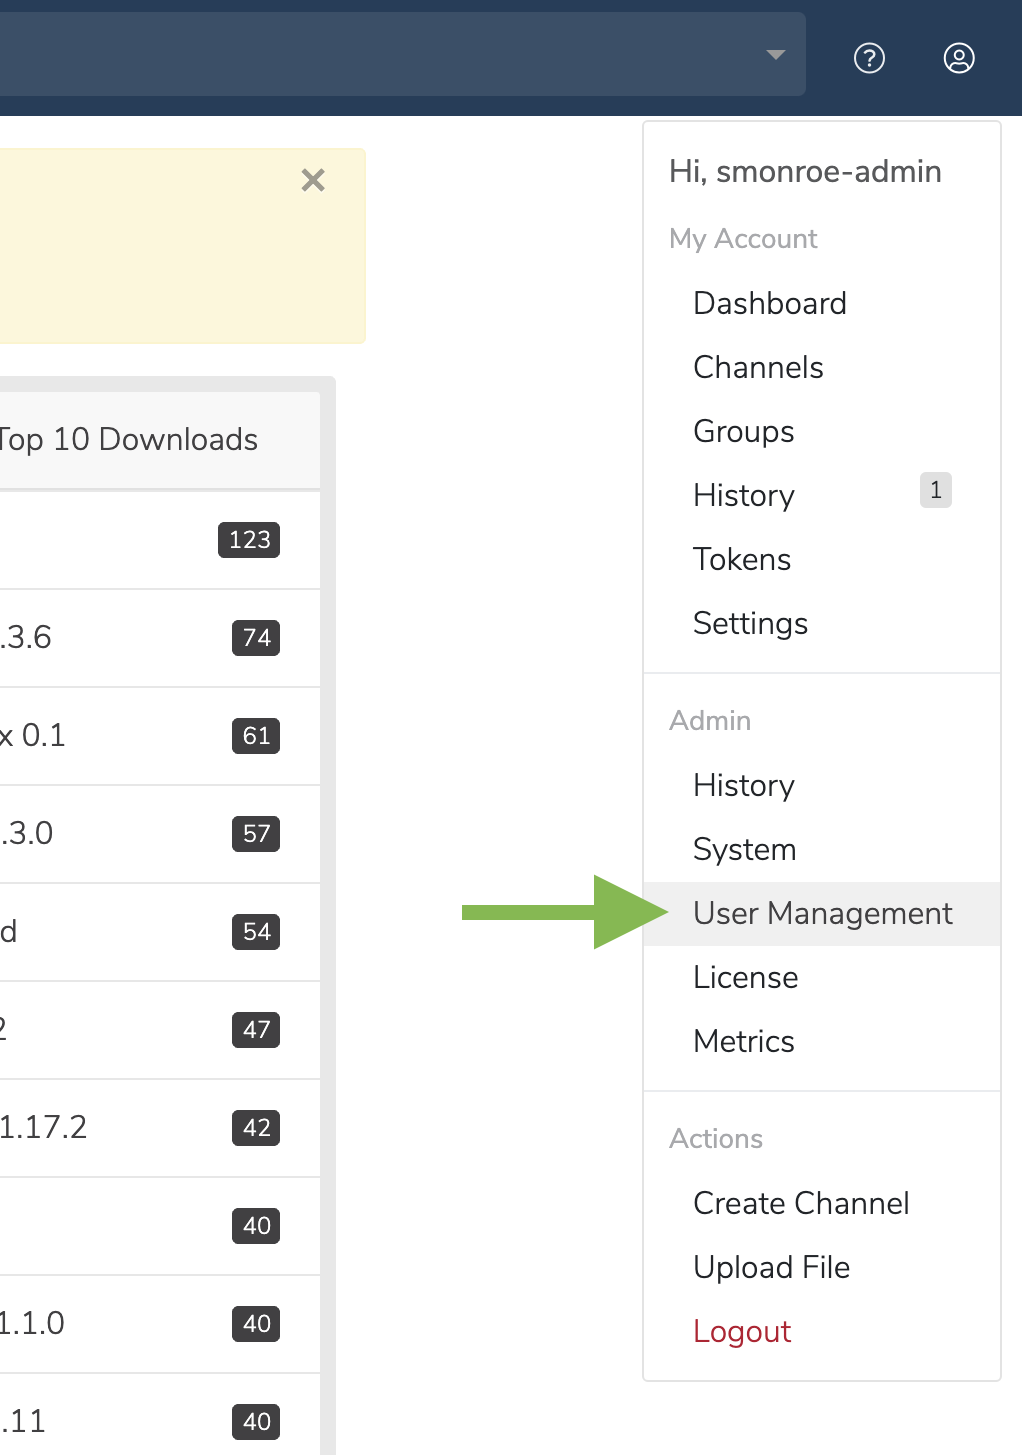
From Team Edition, click on the My account button in the top right.
In the dropdown, under Admin, select User Management.
On the User Management screen, click the Manage Users button. You will be directed to the Keycloak login screen.
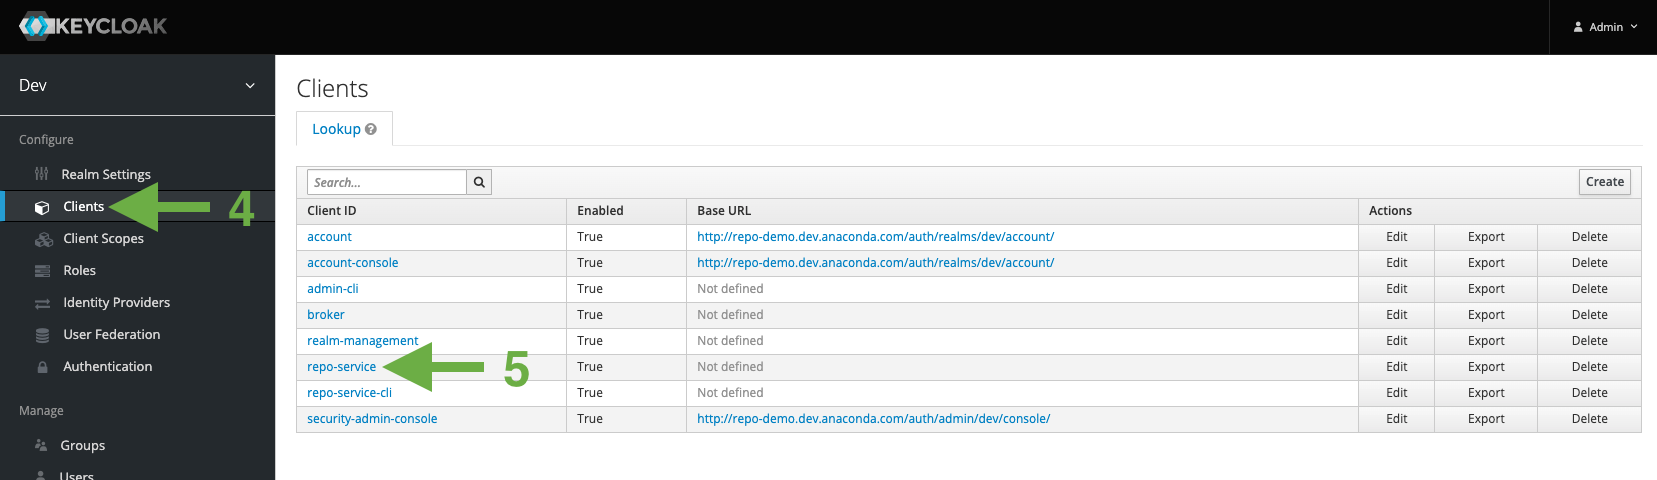
Log in to Keycloak using the keycloak master realm admin account, and then go to the Clients page under Configure.
On the Clients page, select repo-service. This is the default client ID.
On the Repo-service page, scroll down to the Root URL and Valid Redirect URIs settings.
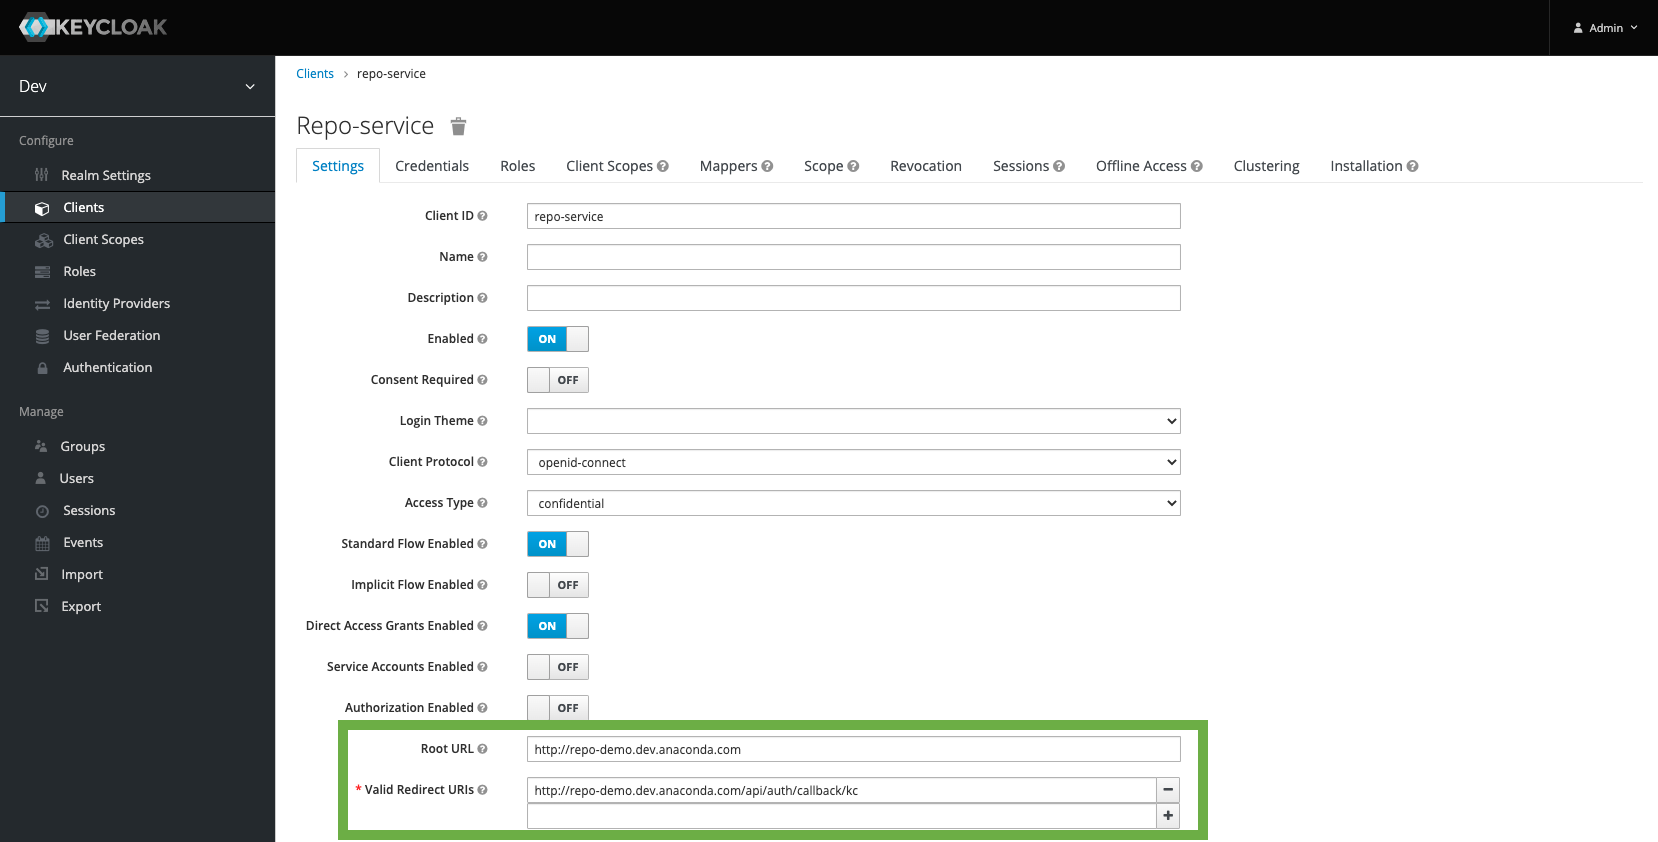
Update the Root URL to your new domain:
https://<DOMAIN>
Update the Valid Redirect URIs to your new domain’s Keycloak redirect path:
https://<DOMAIN>/api/auth/callback/kc
Click Save.
If you have SSL, make sure to update your certificates in the Configuring SSL section to refer to your new domain.
Run docker-compose restart:
docker-compose restart
Configuring SSL
The following steps will allow you to configure the SSL:
Add or remove the following lines relating to the SSL in
<BASE_INSTALL_DIR>/config/nginx/conf.d/repo.conf, where<BASE_INSTALL_DIR>is the installation directory:listen 8080 ssl; ssl_certificate /etc/nginx/certs/tls.crt; ssl_certificate_key /etc/nginx/certs/tls.key; ssl_protocols TLSv1.2 TLSv1.3; ssl_ciphers HIGH:!aNULL:!MD5;
Add or remove certificates from the following directory:
# Replace <BASE_INSTALL_DIR> with your base install directory.
<BASE_INSTALL_DIR>/config/nginx/certs
Run the following command:
docker-compose up -d nginx_proxy
Refer to nginx’s documentation for the standard SSL configuration procedure.